These days, more TIG and MIG welders are starting to feature 2T & 4T as standard.
But what is it? And what are the differences between them?
While 2T & 4T are the same thing on TIG and MIG welders, there is a subtle difference in how they work.
2T & 4T – What Is It?
The “t” in these modes stands for “touch.” Meaning how many times the torch trigger needs to be touched to start and stop welding.
2T stands for “2 touch”. This is a two-touch setting that requires the welder to press the torch trigger to start and release to stop. This ideal for short welds.
4T stands for “4 touch”. This is a four-touch setting. This requires you to press and release the trigger to activate the welder and start welding without having to hold the trigger. To deactivate 4T, you press and release the trigger to stop the welding process. This is ideal for longer weld runs.
On TIG welders, the 2T & 4T feature is an alternative to the foot pedal. TIG welders will still come with foot pedals for those who want granular control.
MIG welders have a trigger on the torch as standard, so it’s only the 4T function that adds something new.
Both these settings give a welder greater flexibility in how they approach an individual project.
Although you can find 2T and 4T settings on several welder models, there are variations of how they operate, depending on whether you’re using a TIG welder or a MIG welder.
When Would You Use 2T & 4T Modes?
Like other tools’ modes, a welder’s 2T and 4T modes have several advantages, depending on the type of work you want to perform.
In short, 2T is used when working on shorter weld runs. Examples include tack welding, stitch welding, or welding small joints. 2T allows you to do short welds quickly, making it convenient to start and stop.
4T is used when you need to make longer weld runs or when you need to weld in hard-to-reach places where you can not easily press the trigger. Long weld runs require concentration and sometimes stamina. The 4T mode makes this easier so you can focus on perfecting your weld.
2T vs. 4T in TIG Welding – How It Works
The 2T and 4T feature on a TIG welder is designed as an alternative to the foot pedal. While the foot pedal allows you to control the amperage directly, the 2T and 4T function is an on-and-off switch on the torch with the amperage pre-set on the machine.
Note: you cannot use the foot pedal and switch torch simultaneously, so you choose which one you want to use.
2T in TIG Welding
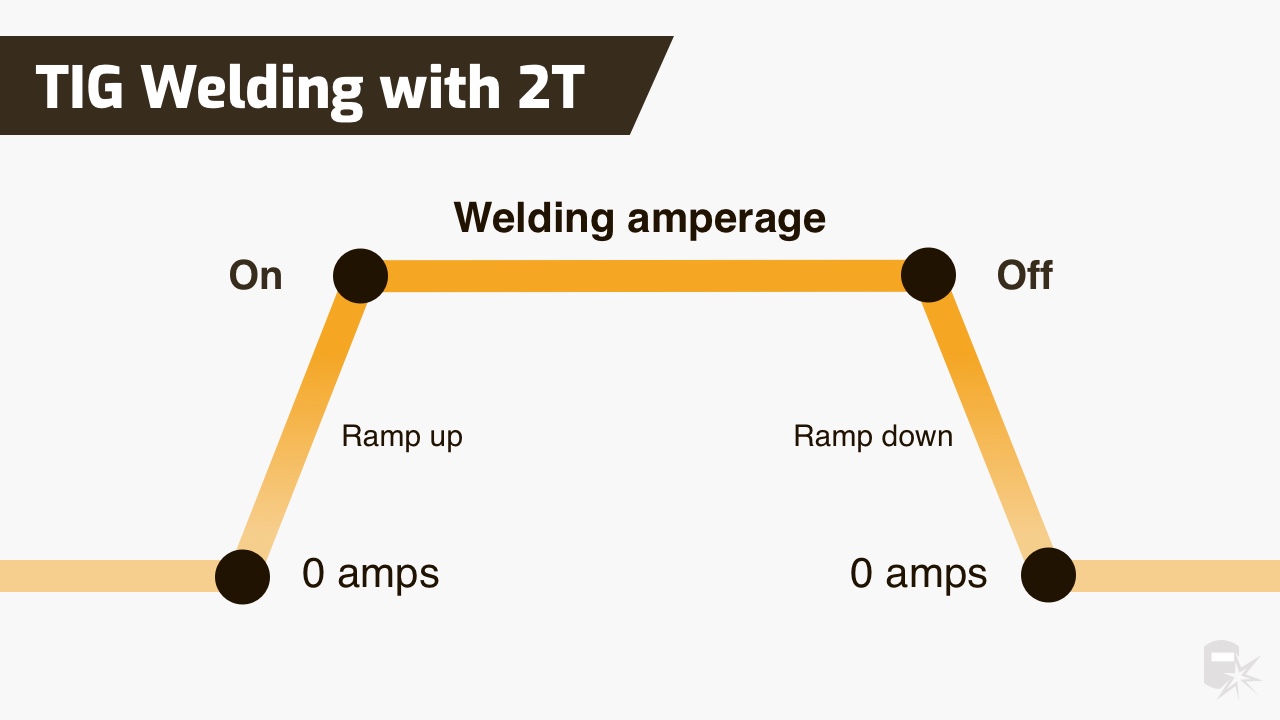
2T in TIG welding (GTAW welding) is very simple. You set the amperage rate to let the machine gradually reach its set amperage. You can choose to adjust the ramp-up and ramp-down time so it does not reach the set welding amperage instantly. This helps prevent blow-through on thin metal.
To activate 2T you press and hold the trigger on the TIG torch to begin welding and release the trigger to stop – 2 touches.

4T in TIG Welding
Using the 4T setting in TIG welding requires a little more work because you have control over the welding cycle and each of its stages.
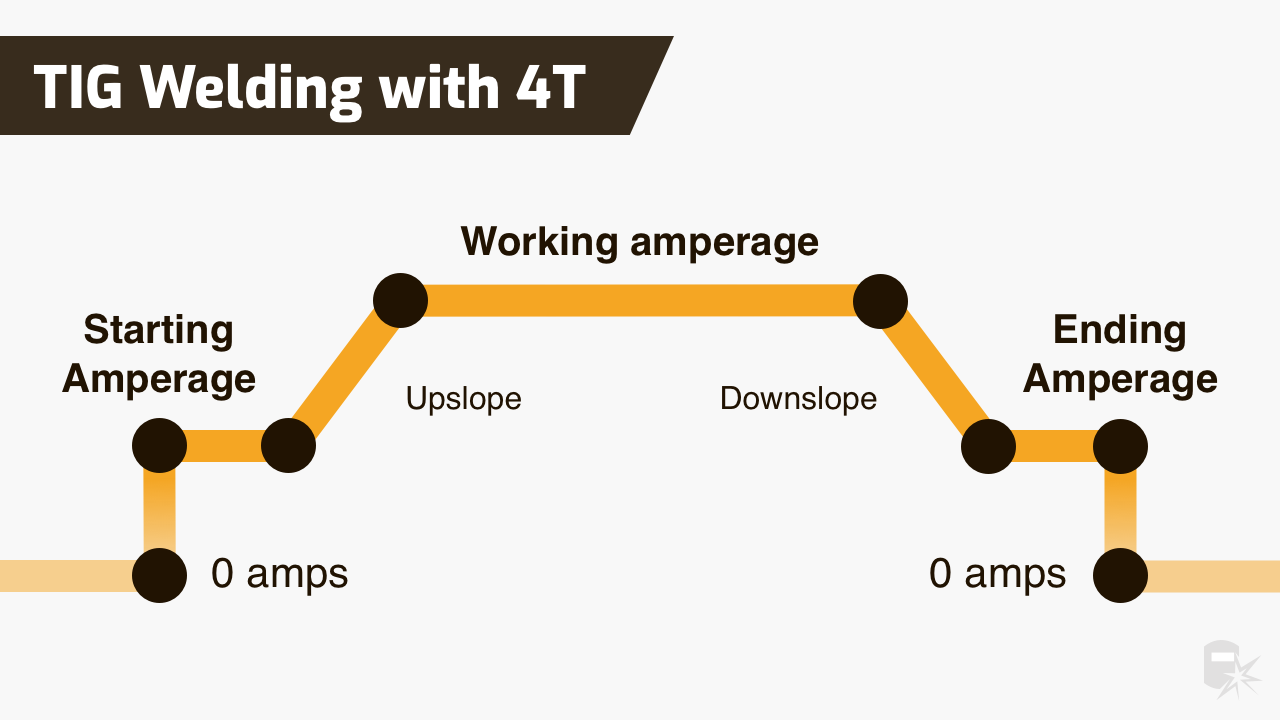
Before starting, you set what is called the starting amperage. This is the amperage you want your TIG welder to operate at before reaching the full working amperage. The advantage with 4T is the starting amperage allows you to preheat the metal before upsloping to your full working amperage.
On the torch, you press and hold the trigger to activate the starting amperage and release it to start the upslope to the working amperage. Here you are free to TIG weld without touching the trigger. To finish, you press the trigger again to downslope to the ending amperage you pre-set and release the trigger to terminate the arc.
Related: TIG Welding Machines – Recommend Picks (with 2T and 4T)

2T vs. 4T in MIG Welding – How It Works
In MIG welding, the 2T and 4T features are not designed to replace anything like the foot pedal on a TIG welder. It is designed to just add more functionality in how you use your MIG gun.
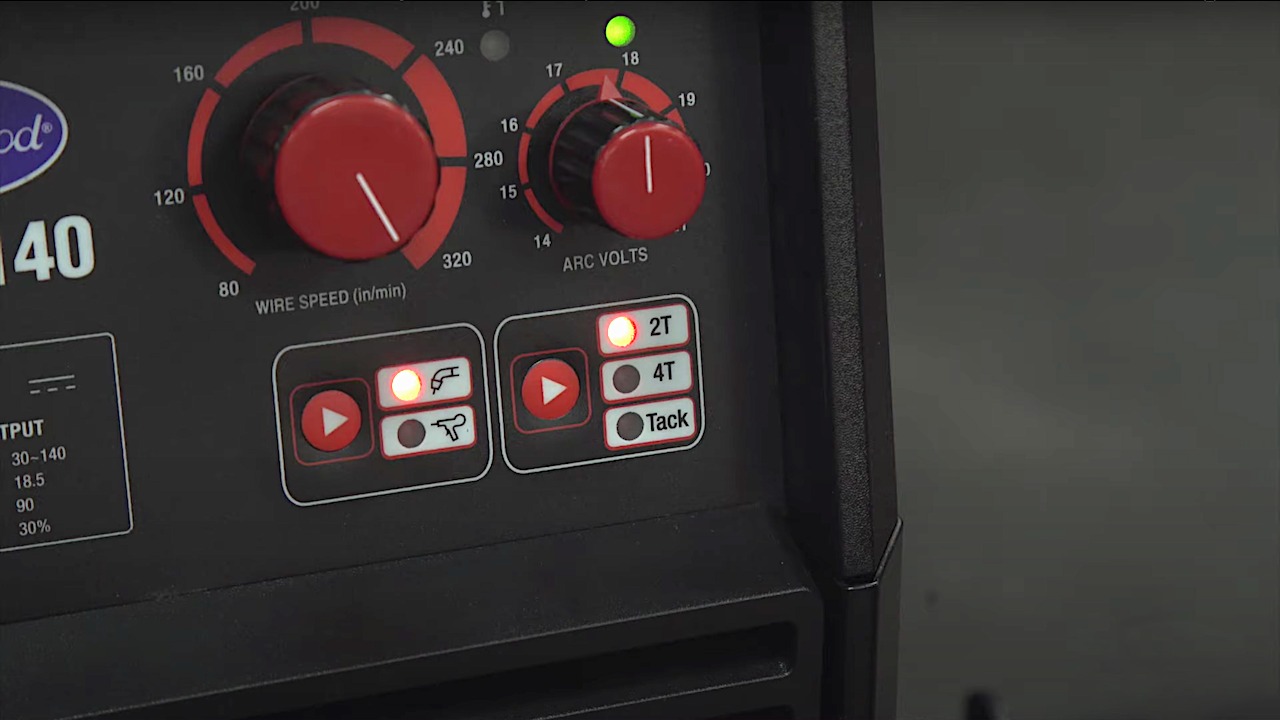
The 2T and 4T functions on a MIG are simple compared to a TIG welder as there is no amperage to worry about. Instead, you preset your voltage and wire speed settings. There are no upslope or downslope settings.
2T in MIG Welding
2T in MIG welding is not really a function. You could say it is the same thing as having no 2T function at all…
You press the trigger on the MIG gun to start welding, and you release the trigger to stop – nothing new at all.
4T in MIG Welding
The 4T function in MIG works the same way as it does in TIG welding but without any pre-starting settings. You press the trigger to start MIG welding and release the trigger to keep it going. This allows to you MIG weld for longer periods without holding the trigger.
To stop, you press the trigger again and rerelease it. Simple!
Related: MIG Welding Machines – Top Picks
