There are many projects where stainless steel is the best material choice. Those of you who have a stick welding (SMAW) machine may wonder whether you can weld stainless steel with it or not.
This article will answer your question and provide the knowledge you’ll need for your next stainless steel project.
Can You Stick Weld Stainless Steel?
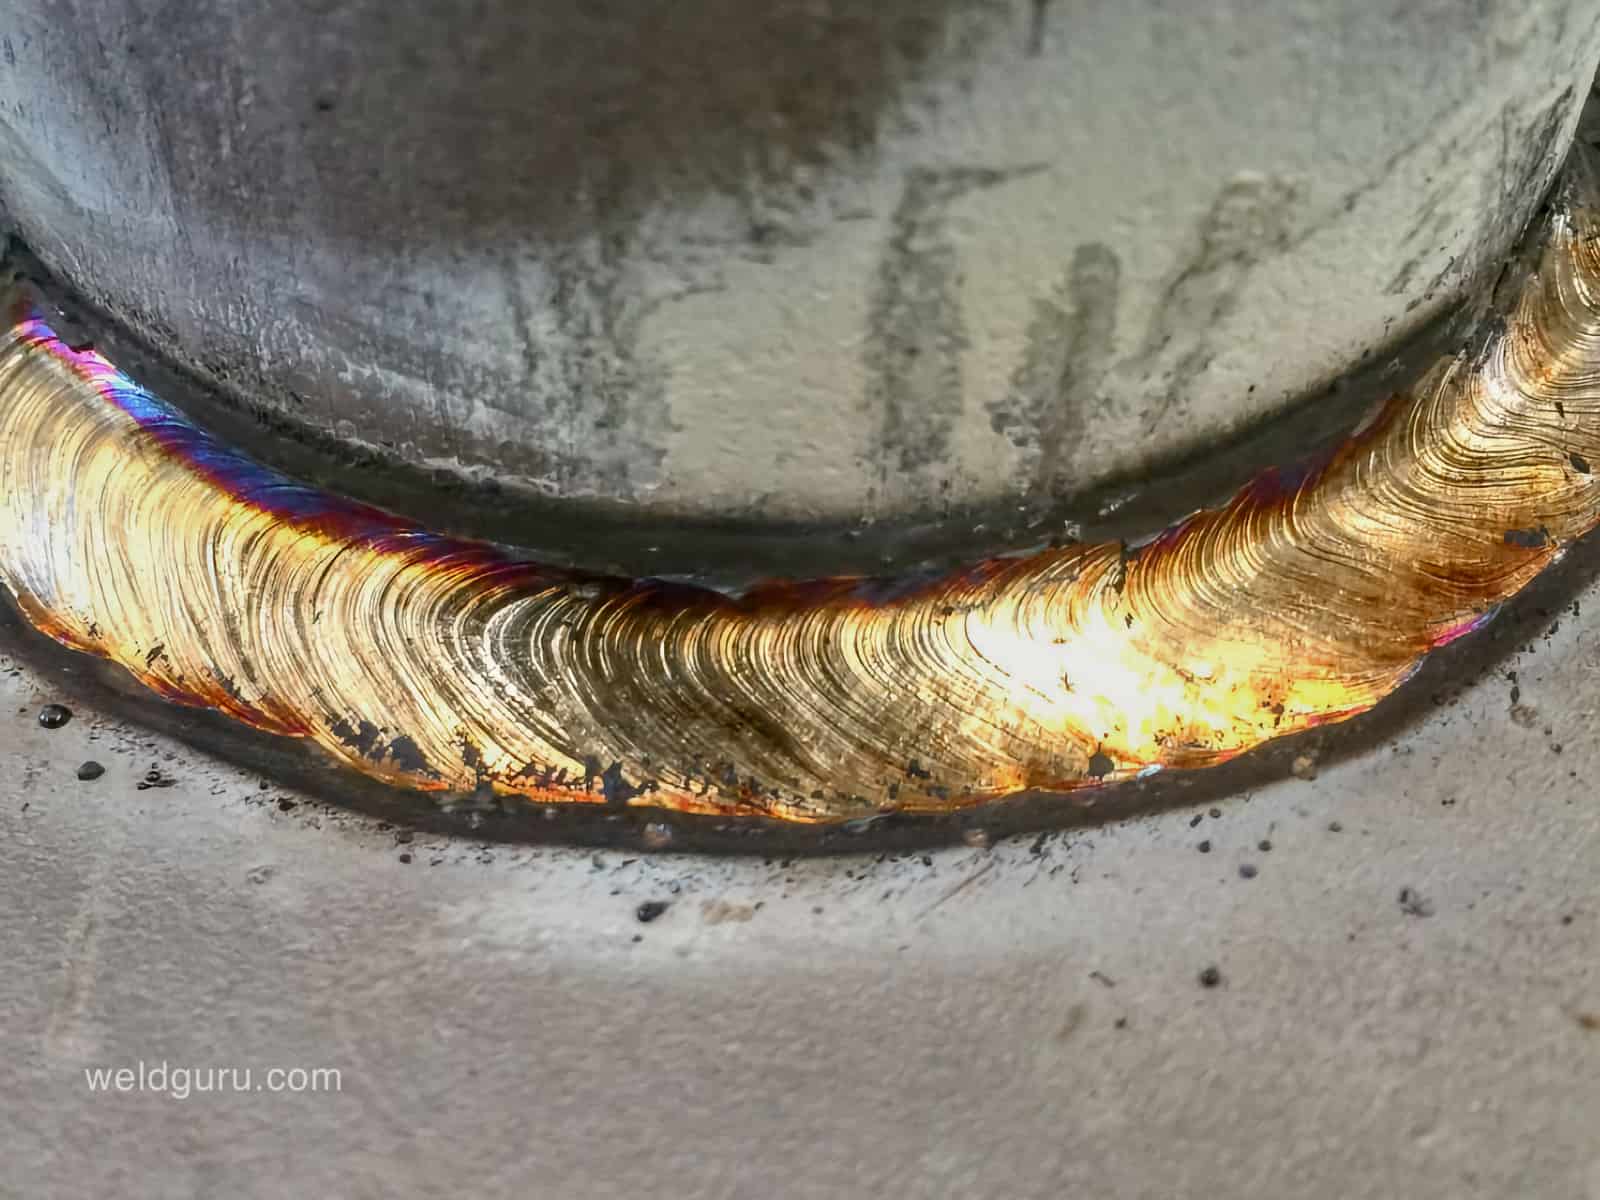
Stick welding stainless steel is possible and can be preferred in certain circumstances. Stick welding requires no shielding gas, unlike the other stainless steel welding processes.
Instead, the electrode provides a self-shielding gas upon burning. This feature makes it a great option for welding outdoors, as the self-shielding gas is wind-resistant.
© weldguru.com – Image usage rights
Stick-welding stainless steel is also popular because it’s low-cost and versatile.
It’s a good choice for DIYers, maintenance/repair, field welding, and situations where a MIG (GMAW) or TIG (GTAW) machine may not have good access.
Understanding Stainless Steel & Its Challenges
Stainless steel shares some characteristics with mild steel but has a few differences.
Understanding what makes stainless steel unique is critical before fabricating and welding.
Different Types of Stainless Steel
There are three types of stainless steel you should be familiar with before using them in your next welding project.
- Austenitic – Most of the stainless steel you’ll encounter will be austenitic. This type of stainless has chromium, nickel, manganese, or molybdenum as alloying elements. These elements give austenitic stainless good corrosion resistance and weldability. You may encounter 304, 310, and 316 austenitic stainless steel grades. This type of stainless steel is non-magnetic.
- Ferritic – These stainless steels have less nickel, which reduces their price. Ferritic stainless steels are tougher because they have more chromium and molybdenum and are magnetic, unlike austenitic stainless. You may encounter some common grades: 409, 430, and 444.
- Martensitic – This type of stainless is for applications with a tempered and hardened edge. It’s usually in knives or other cutting tools, so it’s unlikely that you’d find yourself welding martensitic stainless steel. Common grades you’d find are 410, 420, and 440.
Properties of Stainless Steel
Many properties make stainless steel unique, especially when compared to mild steel.
You must understand these properties if you’re going to be successful in stick welding stainless steel.
- Corrosion and heat resistance – Compared to mild steel, stainless steel is far more resistant to corrosion and heat because of the chromium and nickel additions.
- Good durability – Stainless steel is far more durable and wear-resistant than mild steel. For this reason, stainless steel can be a good option in instances where mild steel would wear too fast.
- High tensile strength – Many of the alloys in stainless steel also improve the tensile strength. The actual tensile strength depends on the grade, but it’s usually higher than mild steel.
- Good weldability – Most welding processes, including stick welding, can weld the common grades you’ll encounter.
- Good formability – Even though stainless steel is tougher than mild steel, most metal forming processes will bend it.
In applications where corrosion, heat, or durability is a concern, stainless steel wins against carbon.
The Challenges Stick Welding Stainless Steel
Welding stainless steel has many unique challenges over welding mild steel, and stick welding is no exception.
The first challenge is that stainless steel must be spotless before welding. Stick welding can be more forgiving of contamination, but dirt, grime, or oils may cause weld defects.
To this end, you must take the time to clean the weld area before welding. Use tools such as your wire brush and grinding disc on stainless only. Using these tools on other types of steel and then stainless will contaminate your weld and parent metal.
The low thermal conductivity and high thermal expansion of stainless steel are other issues you need to consider. The low thermal conductivity means that heat does not dissipate through the metal as fast as mild steel.
Stainless steel will stay hotter for longer than mild steel, which aids in its thermal expansion.
Along with the low thermal conductivity, the high thermal expansion rate also poses problems. Compared to mild steel, stainless steel will expand more from the welding heat.
Low thermal conductivity and high thermal expansion rates result in more distortion and cracking.
If you weld with too much heat, the chromium in the weld gets depleted. This results in the weld and adjacent areas becoming less corrosion-resistant.
Selecting the Right Electrode for Your Project
One of the most important aspects of stick welding is the selection of the electrode.
If you choose the wrong electrode, your weld could be ineffective because it won’t fuse well with the base metals.
Common Electrodes
Most of the welding you’ll do will be on austenitic stainless steel. The most common electrodes you’ll find for welding this type of stainless are:
- 308L – 308L electrodes are the most popular option when welding many austenitic stainless steels. You’ll use these electrodes for welding stainless steel grades of 304 or lower. They can also weld 200 series stainless.
- 316L – You’ll use 316L electrodes to weld 316L stainless steel or similar stainless alloys. You can also choose a 316L electrode when welding cast steels.
- 309L – You use this electrode for welding stainless steel to mild steel or other dissimilar metals. For example, 309L can weld carbon steel to alloy steel or alloy steel to stainless steel.
Not sure what these numbers mean? Read: Stick Welding Electrode Number Identification.
What Electrode Diameter Should You Choose?
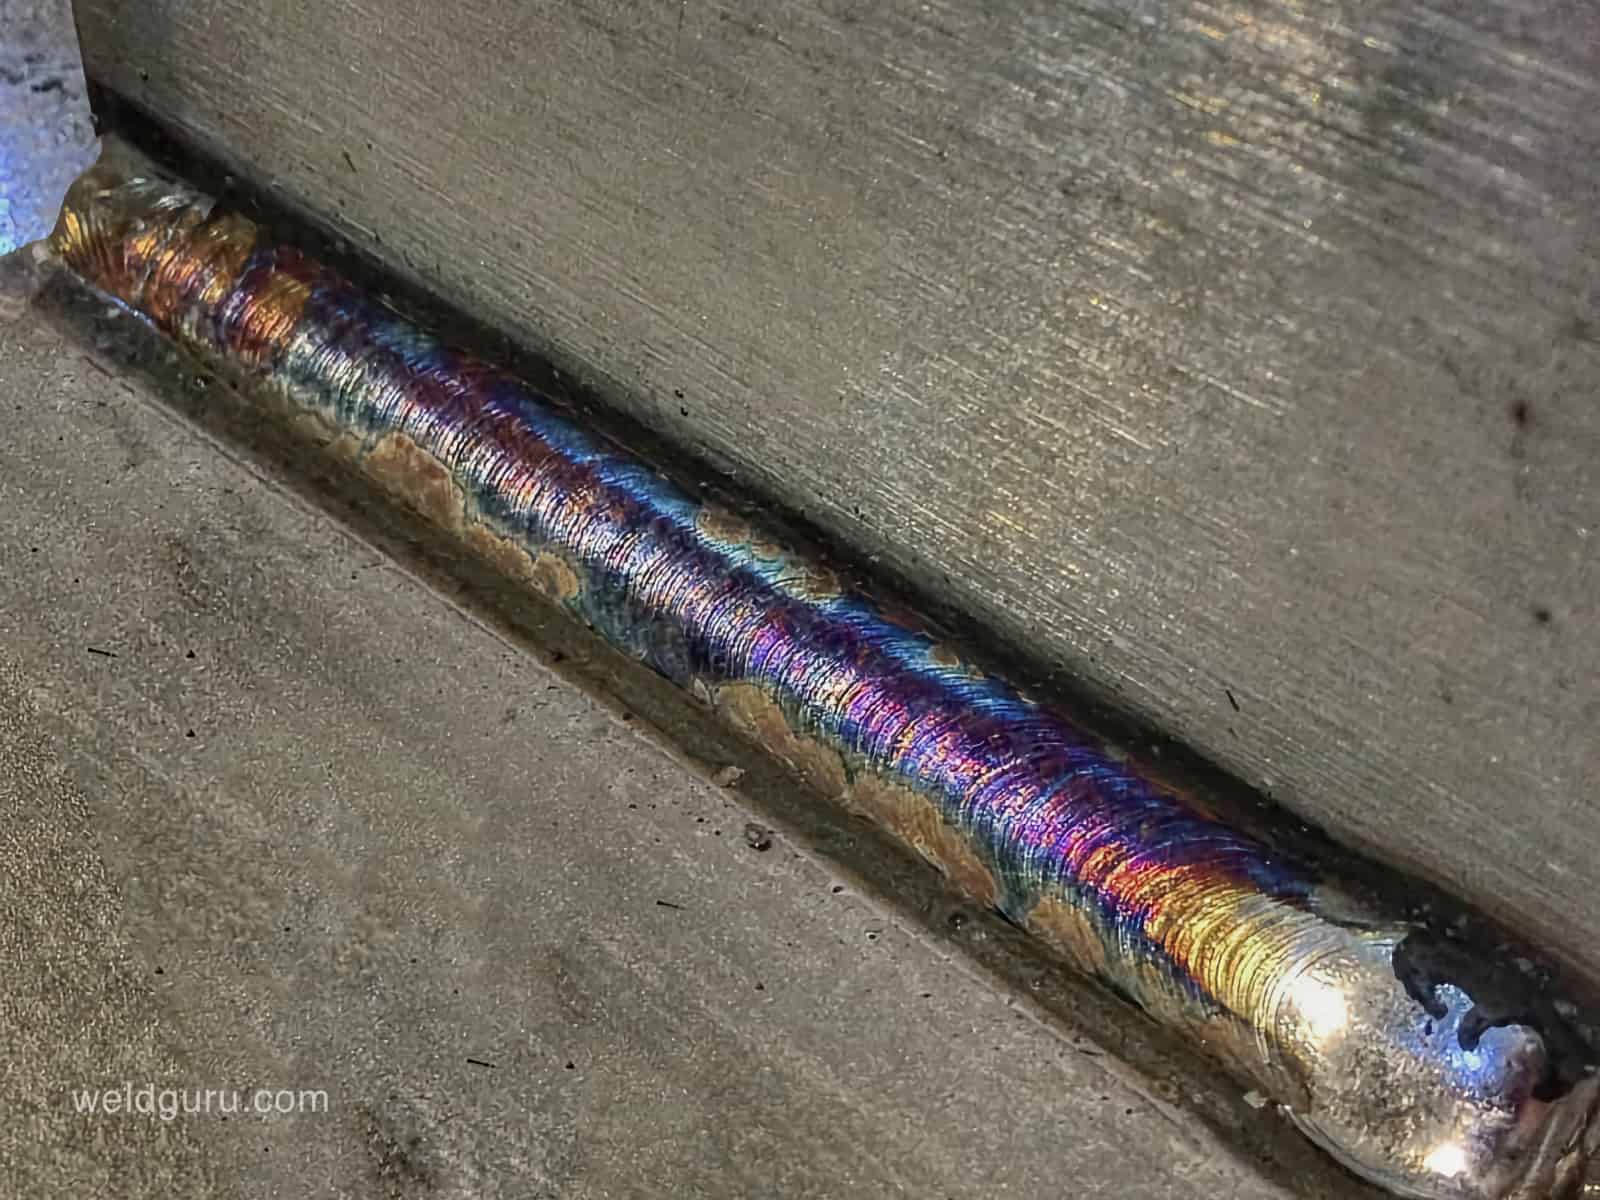
A rule of thumb for stick welding electrode size is to select an electrode with a diameter smaller than the base metal thickness.
For example, if you’re welding ¼” thick metal, your electrode diameter should be less than ¼”.
© weldguru.com – Image usage rights
For overhead or vertical welding, you’ll want to pick electrodes that are smaller in diameter than you would if welding in the flat or horizontal. The reason behind this is to minimize overheating issues.
What Are the Types of Electrode Coatings?
Stainless steel electrodes have three types of coating with unique properties to consider for your welding project.
Lime-coated Electrodes
- Have the number suffix of -15 (example 308L-15).
- Direct current electrode positive (DCEP) only.
- Good for all position welding but especially for overhead or vertical welds.
- Also appropriate for all positions of pipe welding.
- The slag layer is thin and freezes fast, so it’s good for out-of-position welds.
- Slag is difficult to remove and can cause inclusions if not completely cleaned.
Titania-coated electrodes
- Have the number suffix of -16 (example 308L-16).
- Is the most popular electrode.
- Alternating or direct current electrode positive (AC or DCEP).
- Used primarily for flat and horizontal welding.
- Slag freezes slowly and can be removed easily.
- Provides a stable, clean arc with easy restarting.
- Example of a 308L-16 rod available on Amazon
Silica-titania coated electrodes
- Have a number suffix of -17 (example 308L-17)
- Alternating or direct current electrode positive (AC or DCEP), but the preferred option is direct current electrode positive.
- Minimal cleanup in flat and horizontal welds
- Able to weld in vertical and overhead situations
- Weld puddle has good wetting action and produces a smooth concave weld.
Understanding how these coatings affect the weld is an important part of the electrode selection process.
Preparing To Stick Weld Stainless Steel
Stainless steel needs more preparation before welding than mild or even alloy steel.
You must consider these factors every time you stick weld stainless steel if you want to be successful.
Cleaning Stainless Steel
Always clean stainless steel before fabrication and welding. Remove all dirt, oil, and grime, making sure the surface is free of any moisture.
Brushing the surface with a stainless steel wire brush will help to remove any built-up oxides or other contaminants stuck to the surface.
Any time you work with stainless steel, you must use tools that only touch stainless steel and never any other materials.
Any solvents or cleaners that you use must not leave a residue behind.
Joint Preparation
The type of joint preparation will depend on many factors, and there’s no one size fits all method for determining the proper joint preparation. Often, the weld procedure tells you how to prepare the weld joint.
For many welding applications, you’ll use the standard weld joint designs that one would select for mild steel. Tee, lap, butt, corner, and edge joints are all used on stainless steel fabrications.
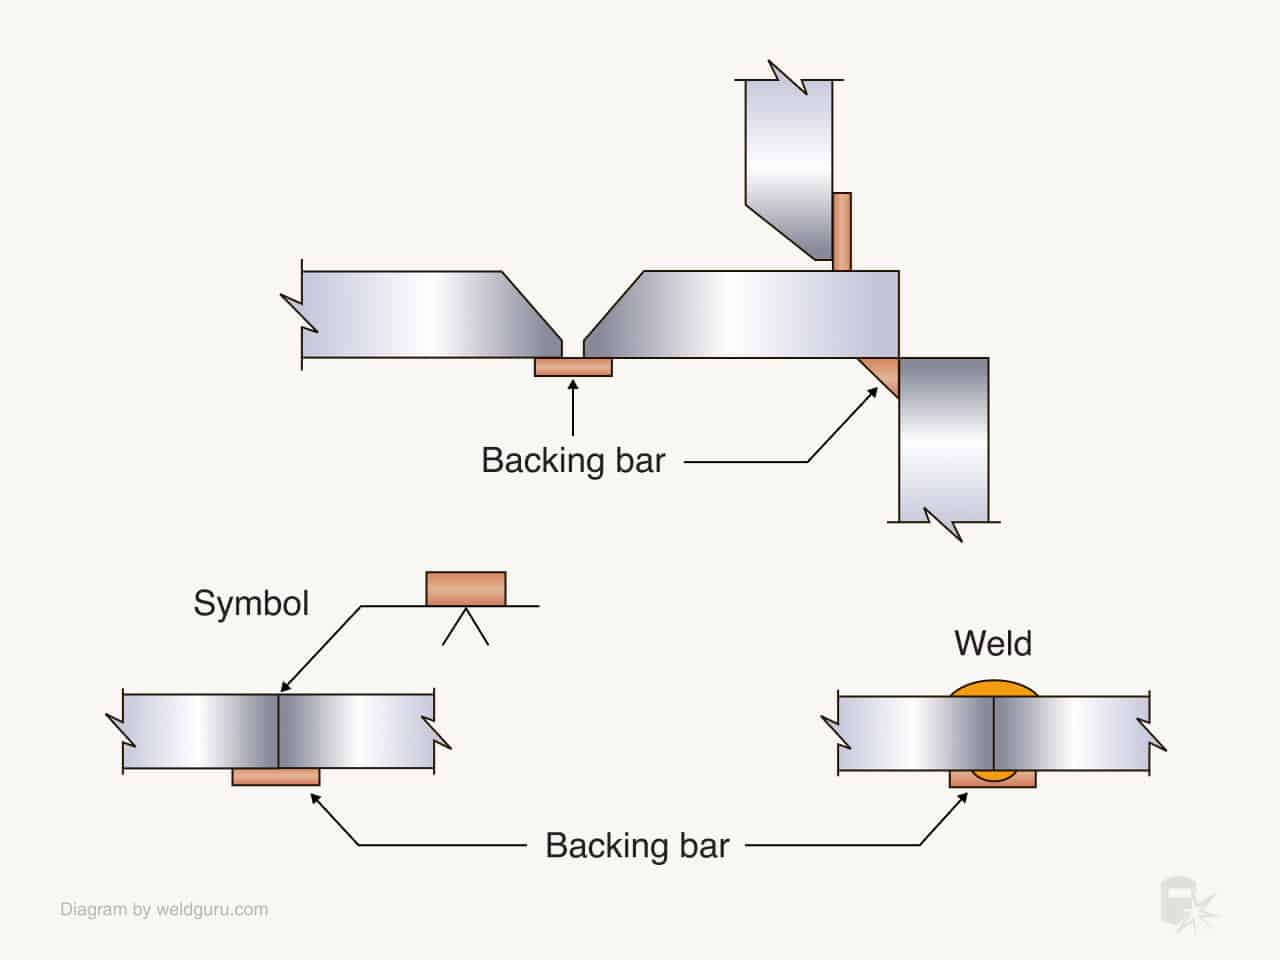
Thin stainless steel is more prone to distortion. Using copper “chilling bars” on the back side of the weld joint will help soak the heat away and protect the backside of the joint from oxidation.
Chilling bars will help to prevent the burning through or excessive distortion in part.
© weldguru.com – Image usage rights
When welding pipe or butt joints on thicker plates, you must bevel the edges to ensure the weld penetrates the joint completely.
Generally, a preset weld procedure tells you the exact bevel sizes and angles. As a general guideline, you’ll want a bevel with a “V” shape and an included angle of around 60 degrees.
Beveled weld joints often have a gap at the root of the joint and a flat spot referred to as the root face or the root land.
Ideally, you’ll want the root opening to be the same size as the root face. For example, if you have a ⅛” root opening, you’ll want a ⅛” root face.
A good practice is to use a copper backing bar on the back side of the weld joint. This technique helps to prevent the root pass from falling through the gap and protects the back of the weld joint from the atmosphere.
It also allows the heat to dissipate, preventing distortion and carbide precipitation.
Proper Electrode Care
Stainless steel stick welding electrodes are like low hydrogen electrodes. Once you open the airtight seal on a new box of electrodes, you must keep from absorbing moisture.
The best way to do this is to use a rod oven to keep your electrodes warm and dry. When you remove electrodes from the rod oven, ensure they don’t stay out too long.
Portable oven rods are popular as they are easy to carry around and to have on hand, plus they are not as expensive as full-sized electrode rod oven.
Only take enough electrodes to do the welding you need to do in the next two hours.
Before welding, inspect the electrodes for damage or contamination and always discard the stubs in a metal bucket, not the floor.
11 Tips & Techniques to Stick Weld Stainless Steel Successfully
© weldguru.com – Image usage rights
Stainless steel can be challenging for beginners, so here are some stick welding tips to help you.
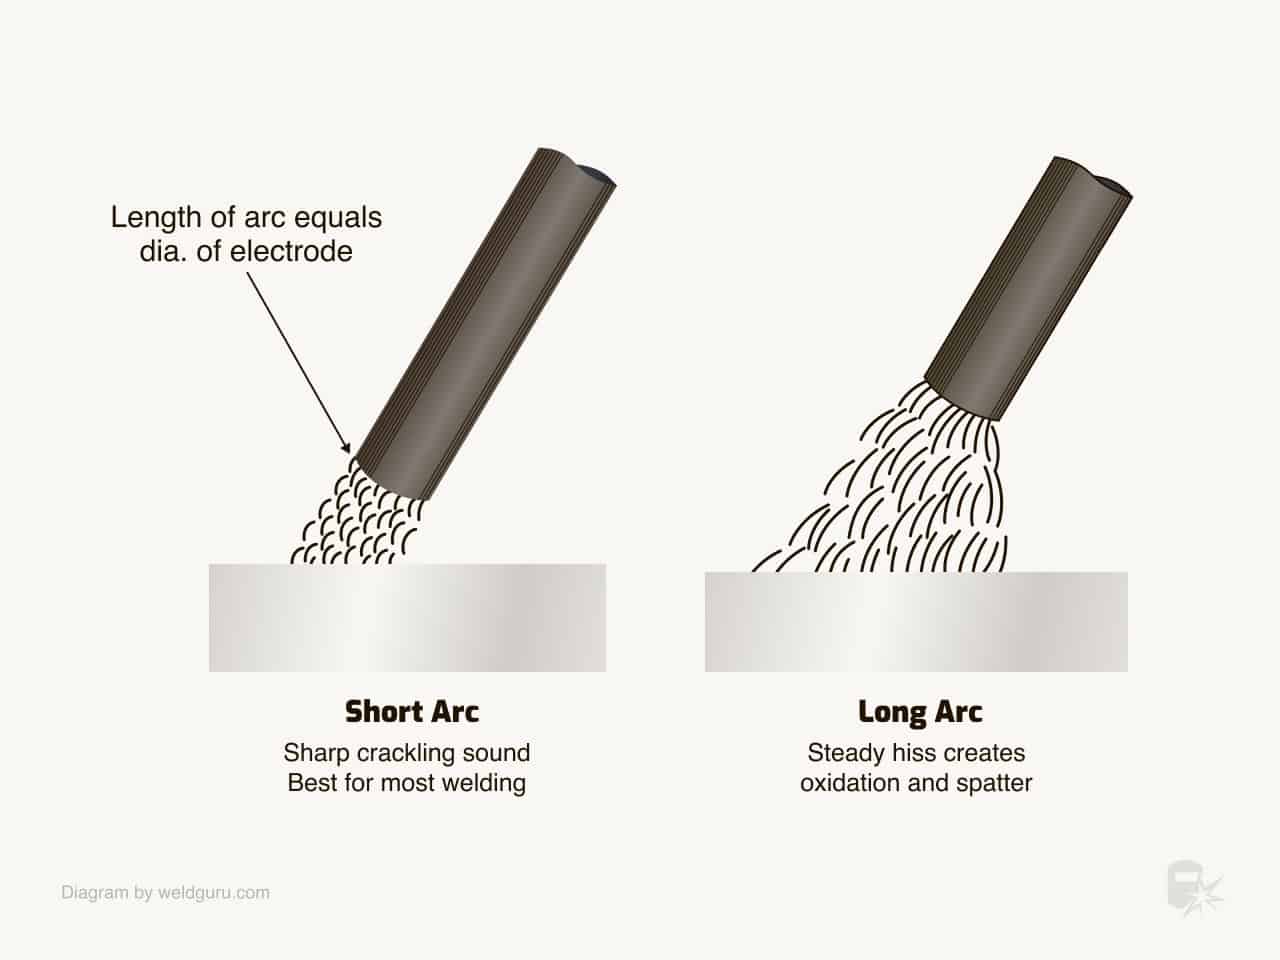
1. Use a Short Arc Length
© weldguru.com – Image usage rights
You’ll want to keep the arc as short as possible without the electrode tip touching the puddle. Doing this will help reduce the spatter and possible porosity while avoiding alloy loss.
This practice will also keep your voltage low, making your weld puddle thinner and easier to control for proper fusion.
2. Weld With the Lowest Current Settings
When you weld with a lower current, you input less heat. This is important to control the distortion and reduce the possibility of cracking.
3. Using Smaller Stringer Beads
Instead of large weld beads, use smaller stringer beads. This choice will help reduce the heat you put into the weld and reduce distortion and chromium depletion.
Smaller stringers will have a reduced chance of hidden weld defects that larger welds could easily hide.
4. Keep the Weld Profile Flat
To make slag easier to remove, lay down weld beads that are flatter in profile. If your weld beads are too tall, the slag can get caught in the undercut on the toes of the welds, making it harder to chip away.
5. Always Fill in the Craters
Before you end a weld bead, always take the time to fill the craters. Doing this is the best way to avoid crater cracking.
To do this, move the arc back over the end of the weld to build up the weld metal until you fill the crater. Keep the arc length short.
6. Clean Your Welds
When you finish a weld bead, clean it properly, especially if you’re laying another weld bead over it, especially when welding with lime-coated electrodes.
The slag formed by these electrodes tends to crumble, which can leave small pieces of slag in the weld area. You must put a lot of care into removing every bit of slag.
7. Use Smaller Electrodes for Out-of-Position Welds
Out-of-position welding, such as vertical and overhead, are challenging because gravity tries to pull the weld puddle down and away from the weld joint. To fight this, you can use a smaller diameter electrode.
Smaller electrodes use less heat and make a smaller weld puddle. Smaller weld puddles freeze faster, which helps to stop the molten metal from falling off the weld joint.
A good rule of thumb is to use a maximum electrode diameter of 5/32” (4.0mm).
8. Use the Right Technique for Vertical Welds
You’ll need to use different techniques depending on the direction and the electrode coating for vertical welds.
Vertical-down welding will use a dragging technique at a higher-than-average amperage because you usually use down-hand welds on thinner materials with faster travel speeds.
You can get good penetration in one pass by dragging the electrode down the joint with a higher amperage. If the material is too thick to do this, you’ll need to use a vertical-up welding technique.
The vertical-up welding technique will depend on the type of electrode used. For example, lime-coated electrodes don’t need a weave pattern. In contrast, other electrodes use a triangle or inverted vee weaving pattern.
9. Avoid Excessive Penetration
The goal should be a weld with penetration that seals the root opening with good fusion to the base metals.
If the penetration is too deep, you could find that the weld cracks or begins to corrode because of depleted chromium.
You’ll want your weld flush with the bottom of your root opening and no more than ⅛” past it.
10. Practice
Use some scrap material to dial in the welding amperage to avoid contaminating the weldment you are working on. The last thing you want to do is grind out bad welds on expensive materials.
11. Avoid Cross-Contamination
Always have separate tools for working on stainless steel that never touch other metals. This practice will help to prevent any cross-contamination.
Post-Weld Clean Up
When you finish a stainless steel weld, thoroughly clean it, especially multi-pass welds.
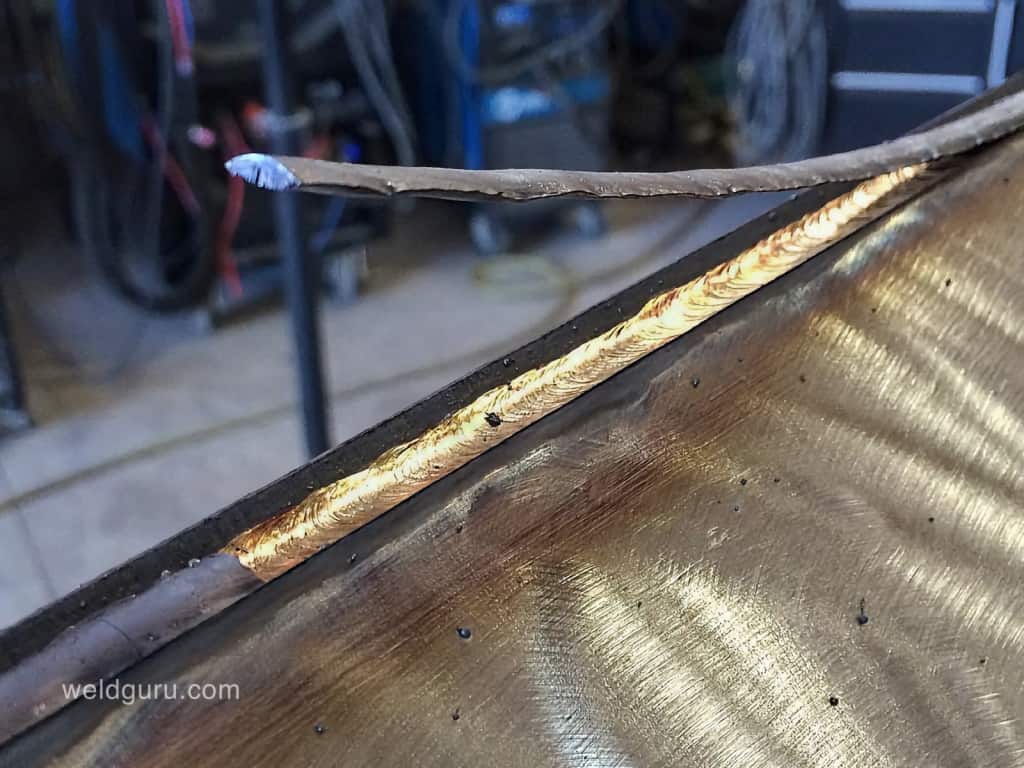
Once the weld has cooled, chip the slag with a chipping hammer only used for stainless steel. After chipping, brush the weld with a stainless steel wire brush to remove any leftover bits of slag.
© weldguru.com – Image usage rights
Blowing any remaining dust away with clean compressed air is a good idea.
Remove all spatter from the weld and surrounding area, avoiding scratching or gouging the base metals.
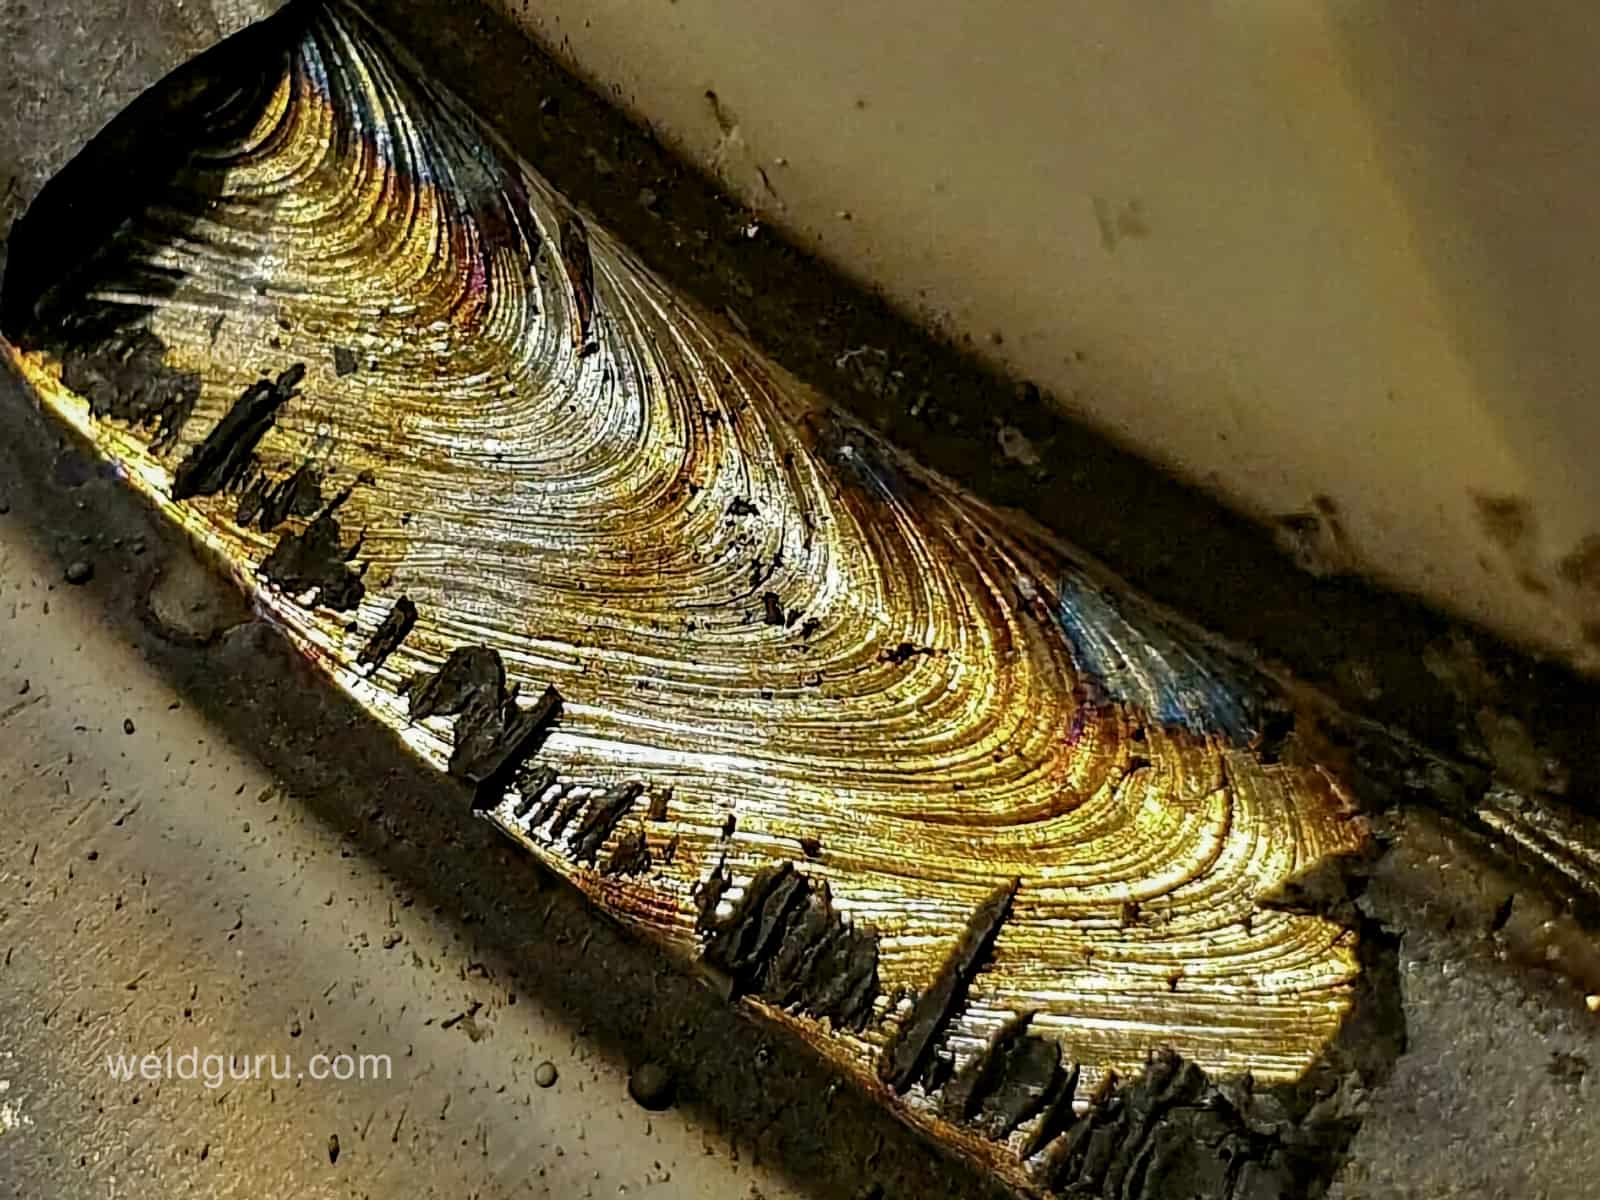
Remove the discoloration of the weld through brushing, pickling paste, acid baths, or electro-polishing. The process you choose will depend on your budget and the methods you have access to.
Removal of this color is necessary because it’s a layer on the surface of the weld which does not have as much chromium as the base metals. If you don’t remove the color, the surface of the weld may start to rust.
Joining Stainless and Other Steels
You can weld stainless steel to mild steel using 309L or 312L electrodes, but 309L is more popular and common.
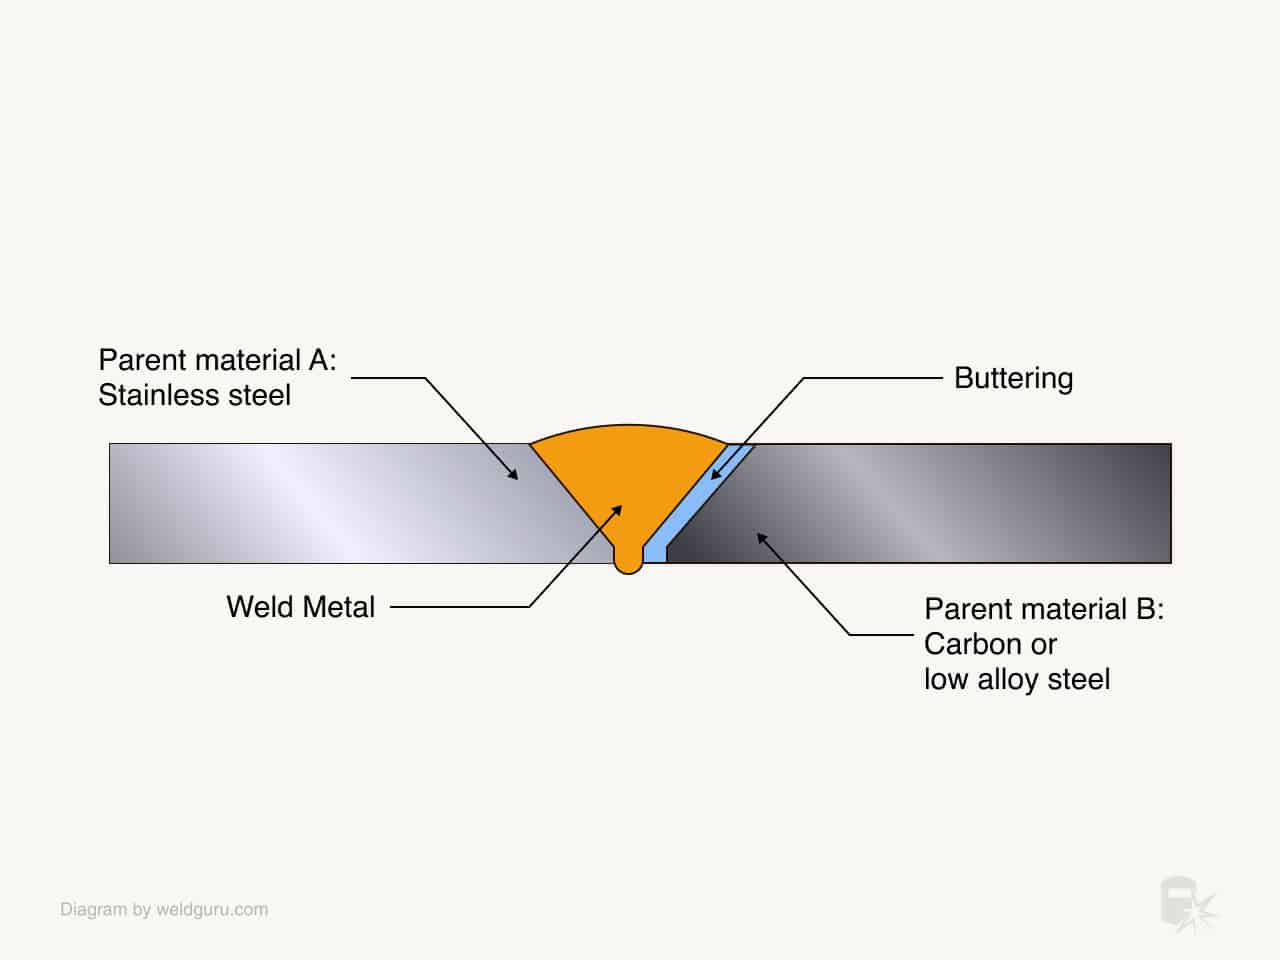
Sometimes, using a technique called “buttering” may be preferable. Buttering is when you use a 309L stainless steel electrode to lay a layer of stainless steel to the carbon steel side of the weld joint.
© weldguru.com – Image usage rights
You can now weld stainless steel to stainless steel rather than carbon or alloy steel to stainless steel.
Buttering lets you use an electrode that matches the stainless steel rather than welding the whole joint with 309L. This technique would be beneficial if you needed to weld 316 stainless steel to mild steel.
The chart below can be a great resource for electrode selection for welding dissimilar stainless steels.
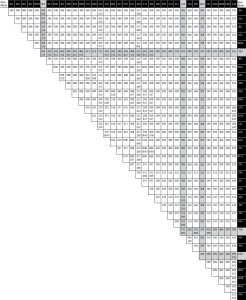
Credit: Hobart
Conclusion
Stick welding of stainless steel is possible and an excellent option to consider, especially if you already have a stick welding machine and some stick welding experience.
If you practice your technique and keep the stainless clean, you’ll master the art of stainless steel stick welding in no time.
Welding is a skill. The more you do it, the better you’ll become.
