MIG welding, also called gas metal arc welding (GMAW), is an awesome welding process for beginners to begin their welding journey.
It’s quick to learn, and the equipment isn’t overly expensive.
It doesn’t come without difficulties, though, as it’s a new skill you’ll be trying to master.
This article will give you 16 great tips to get you on the quickest path to success.
1. Make Sure Your Metal Is Clean
Like every welding process you’ll use in your welding journey, step one should always be to make sure your material is nice and clean.
Clean material is free of mill scale, oil, grease, rust, paint, and any other substance on the steel, making it more difficult to weld.
© weldguru.com – Image usage rights
Suppose any of these substances happen to be on the parent metal. You’ll have porosity and lack of fusion issues, greatly affecting the strength of your weld.
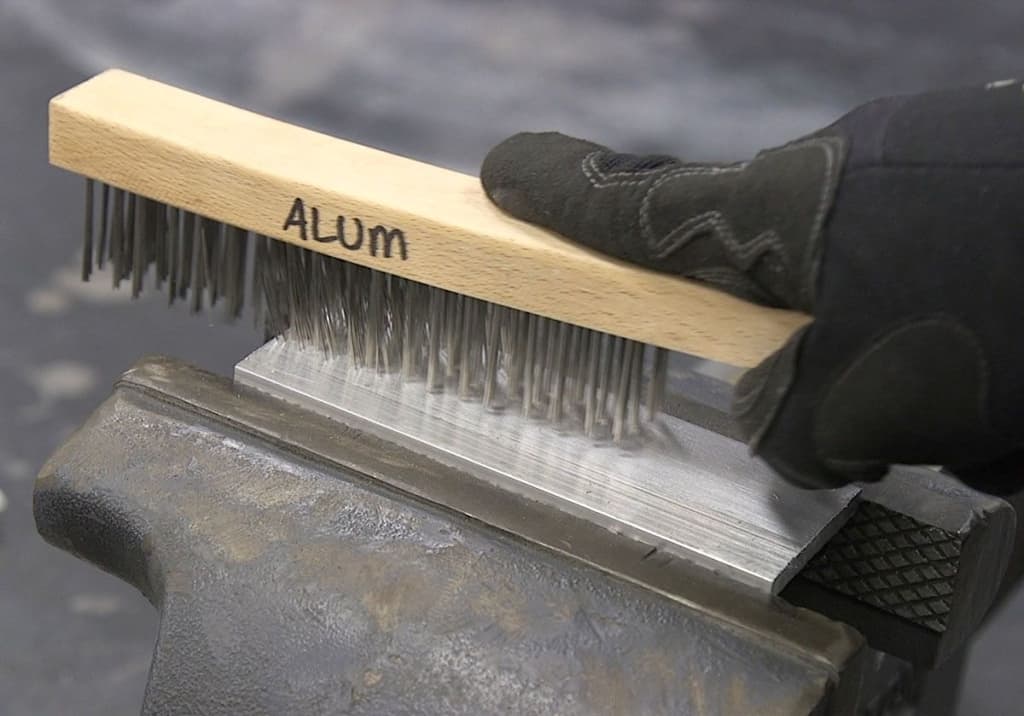
You’ll want to remove those substances with a grinder, buffing wheel, wire brush, and some solvents help. Just ensure none of those solvents are flammable, as this will be an issue when welding.
2. Get a Quality Ground Clamp
Your ground clamp, also called your work clamp in the industry, is very important. It completes the welding circuit, giving you the arc to lay your bead on your parent metal.
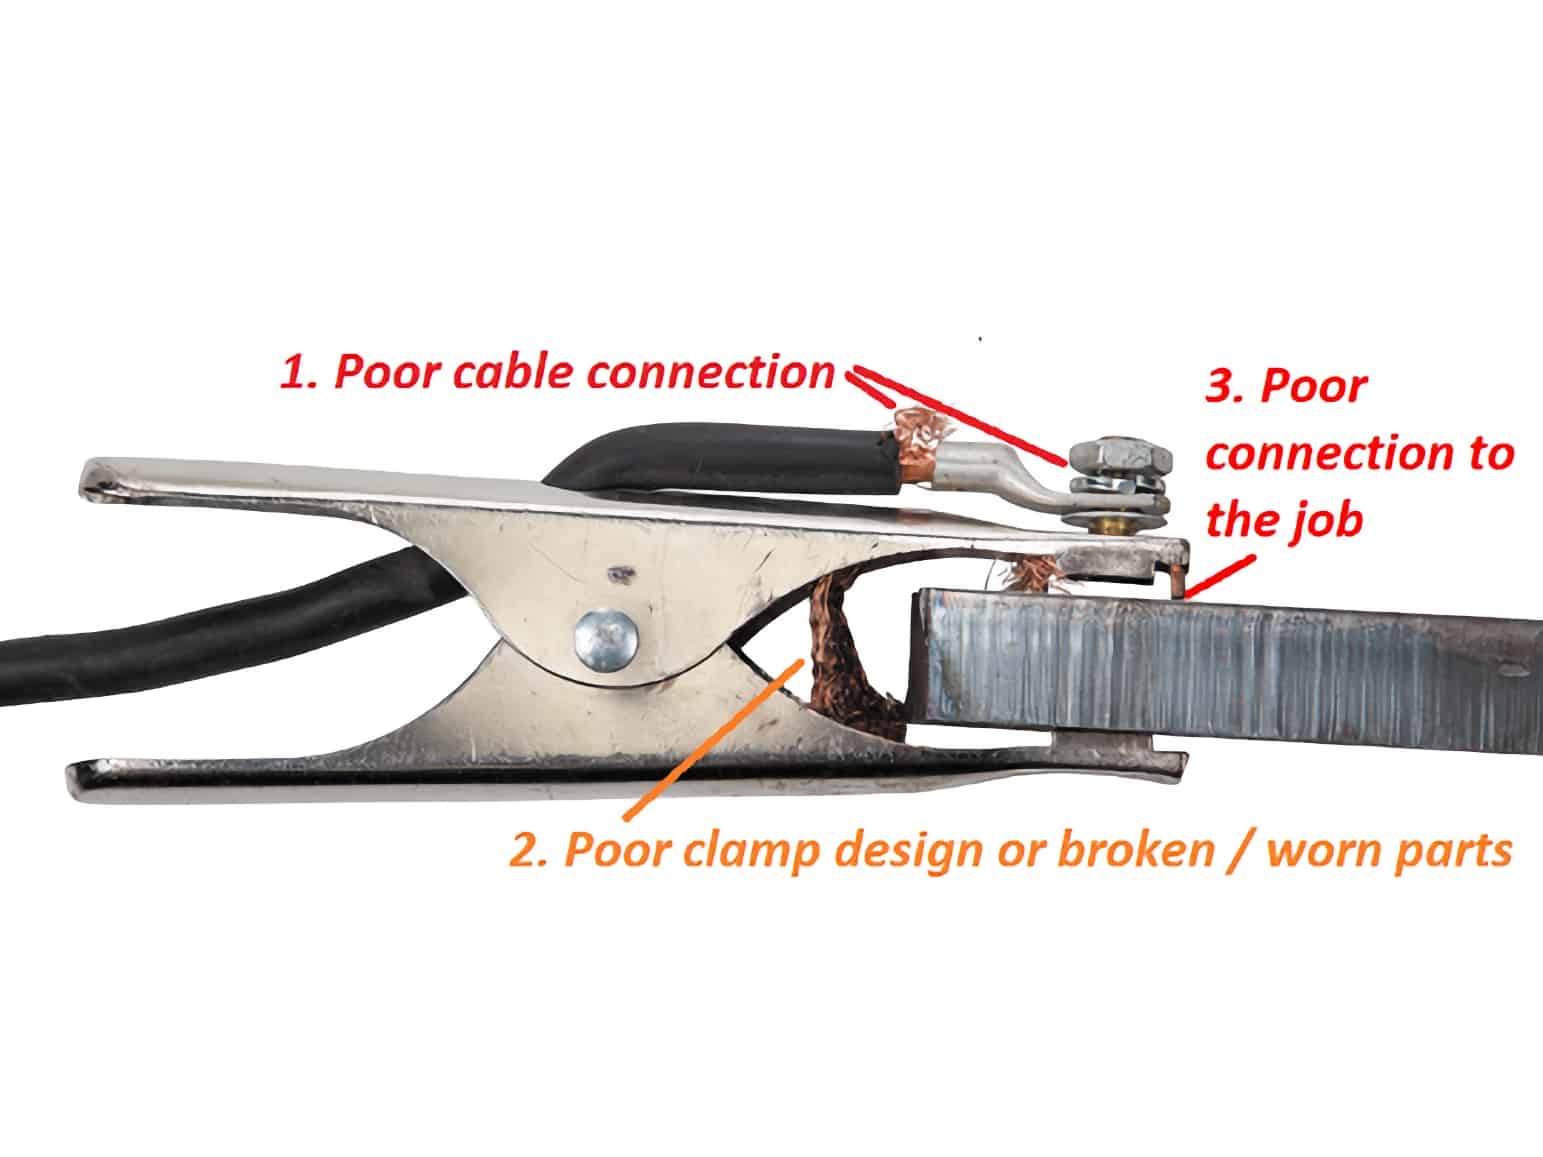
If, for whatever reason, your work clamp doesn’t make proper contact with the steel you’re trying to weld, your arc will be unstable, erratic, and possibly not even strong enough to melt the steel and welding wire.
Credit: https://www.weldclass.com.au
Your work clamp will lose quality over time. The brass teeth will wear down or chip, your spring will get hot and not hold the material as tight, and your cable connection will loosen and not make proper contact anymore.
You need to fix any of these issues immediately, and eventually, you’ll have to purchase a new work clamp.
3. Use the Correct Wire Diameter
Wire diameter depends on the size of weld you’re looking for and the thickness of the steel you want to weld.
The bigger the weld and the thicker the material, the bigger the wire diameter you’ll need.
For most DIY, you’ll make 1/8” to 3/16” stringers, and .035 wire will be your diameter of preference.
For the bodymen out there, you’ll want to go smaller. The .023 wire size will be your go-to.
If you’re working on materials thicker than 1/4”, you’ll want to go up to .045. For materials thicker than 1/2“, I recommend .052 wire for really high deposition rates.
4. Use the Right Shielding Gas
There’s a range of shielding gas you can use for GMAW. From cheapest to most expensive (depending on your local supplier), the list goes from:
- 100% CO2
- 100% argon
- Argon/CO2 mix
- Argon/helium mix
- CO2/helium mix
Argon and CO2 give you a nice shielding gas for your weld puddle. C25 is the most popular choice, where you have 75% argon and 25% CO2.
Adding helium to the mix increases the heat of your weld puddle, forcing you to move it faster and creating a faster welding deposit. You can use this on thicker materials where you want faster deposition rates to get the job done quicker.
My favorite is C8, 92% argon and 8% CO2. I can use it for spray transfer, one of the four modes of weld transfer for MIG, and it gives me a nice stable arc, making the weld puddle easier to control. When the CO2 mixture is above 15%, you cannot achieve spray transfer.
5. Use the Correct Gas Flow Rate
The gas flow rate depends on the gas mixture and the welding environment. On average, you’ll be between 20 and 35, where I find low 20s to mid-20s will be your sweet spot.
You’ll want to go higher than that if there’s a small breeze in your work area, as that’ll push your shielding gas away from your weld puddle.
You’ll also want to go higher when using a helium mixture, as helium is lighter than air and dissipates quickly.
Too much gas flow creates a tornado-like disturbance, bringing gasses from the air into your weld puddle and creating porosity. Too little gas flow won’t be enough shielding protection, giving you porosity in your weld bead.
6. Watch Your Stickout
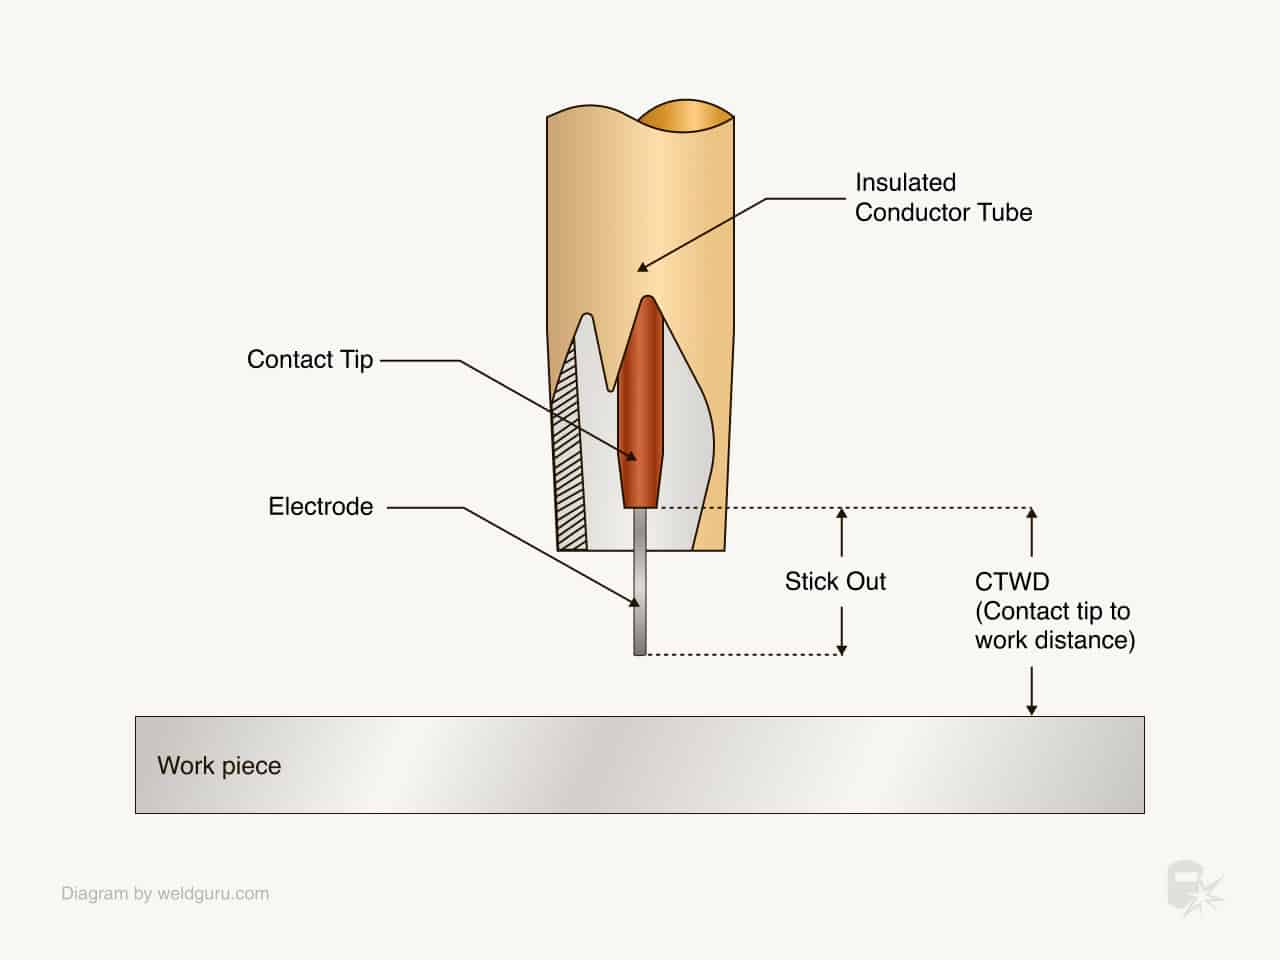
Your stickout is the distance between the tip of your wire to the welding nozzle. The electrode extension is the distance between the tip of the wire to the contact tip.
Ideally, you want your contact tip about 1/8“ but no more than 1/4“ inside your nozzle.
© weldguru.com – Image usage rights
You don’t want your stickout to be too short, as this will give you an erratic arc that is hard to control. It’ll also be hard to see your weld puddle, as your nozzle will hide it, making it harder to control it properly.
Too long of an arc will increase your voltage as the welding machine does its best to maintain that arc, giving you more spatter and a much wider and thinner weld.
7. Hold the MIG Gun With Both Hands
Your MIG gun should fit nicely and comfortably in your hand. There are many different types and models out there. Pick the comfortable one, as you’ll be holding that MIG gun for long periods.
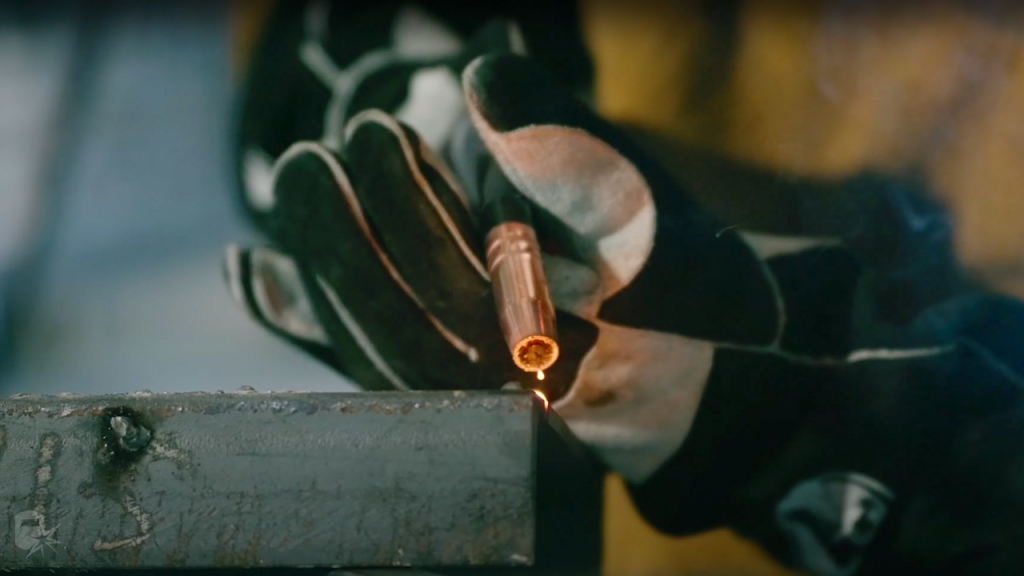
You want your dominant hand to hold it for better control, and you’ll want to use your non-dominant hand to stabilize your MIG gun. You don’t want it to shake too much.
© weldguru.com – Image usage rights
Always try and lean your elbow, forearm, or hand of your non-dominant arm on something sturdy. With that hand, cup the MIG gun.
If you find your non-dominant hand too close to the weld, your hand is getting too hot, or you find yourself burning through too many welding gloves, there are alternatives.
With your non-dominant hand, hold your forearm wrist or even cup the bottom of your hand holding the MIG gun.
This position will give you the greatest stability, so you won’t shake too much and keep your hand away from all that heat.
8. Use the Correct Gun Angle
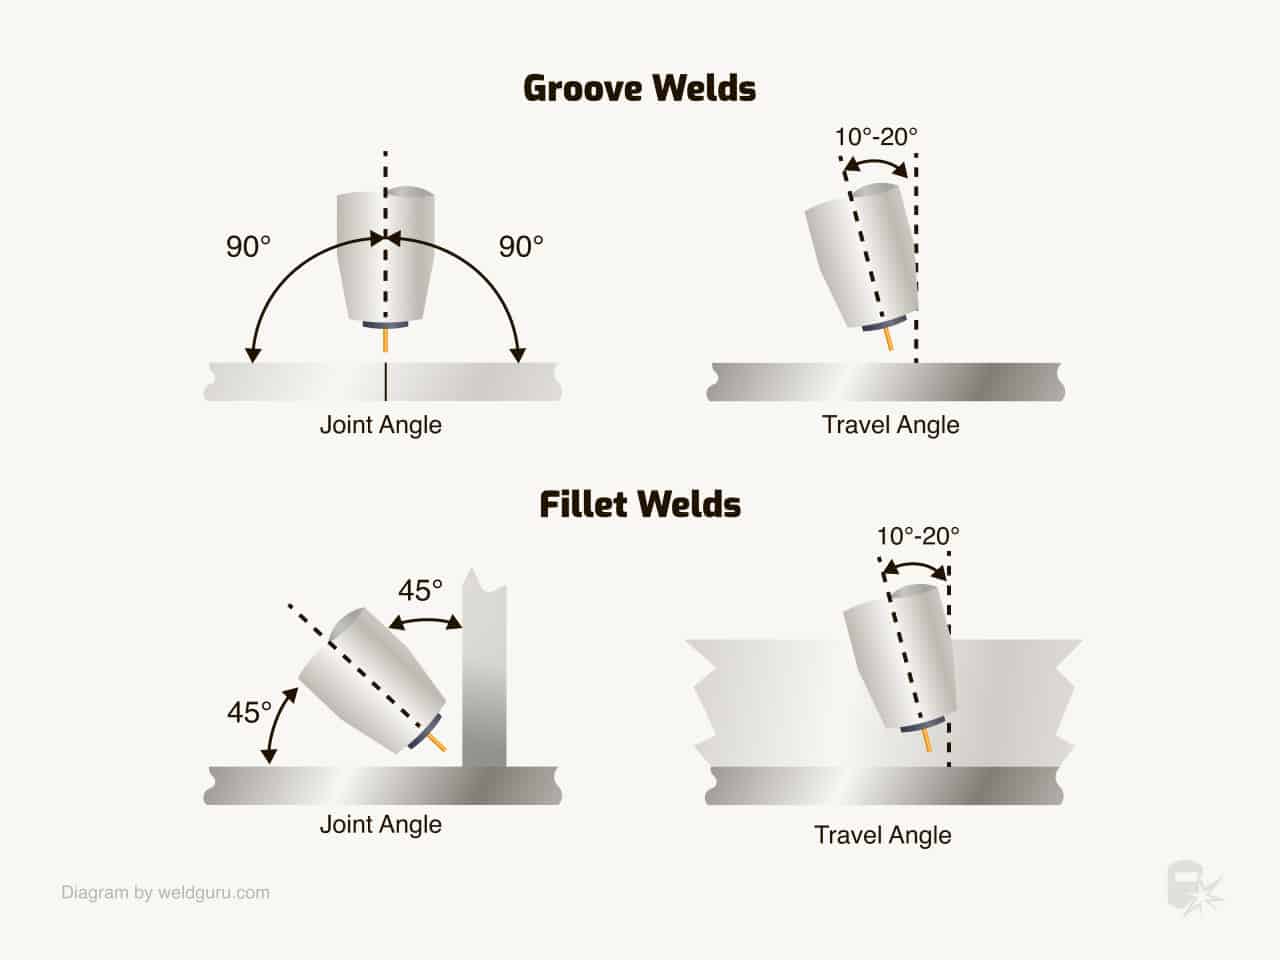
You’ll want to keep two angles in mind when welding: joint angle and travel angle.
Your joint angle will be between your MIG gun and the joint. You want this to be 90 degrees on groove welds and 45 degrees on fillet welds.
© weldguru.com – Image usage rights
Your travel angle is the angle for your direction of travel. This angle should be between 10 to 20 degrees, making 15 degrees your sweet spot.
Going outside these ranges can give you improper shielding gas coverage, bad bead placement, undercut, and cold lap.
9. Use a Good Travel Speed
Your travel speed will depend on the welding size you’re looking for and your heat and wire feed settings. Your travel speed should always be consistent. You don’t want to go fast in some spots and slow in others.
Doing this will give you an inconsistent bead width and penetration throughout your weld length.
Always watch the edges of your weld puddle, and keep that width throughout your weld. Doing this will dictate your travel speed and give you the nice and consistent weld you want.
10. Listen to Your MIG Welding
I bet you didn’t think welding would require active listening.
You’ll want to listen carefully as you’re welding. When you correctly set your voltage and wire speed while using the correct travel speed, your MIG welding will sound like bacon frying in a pan.
You should listen to maintain this sweet sound. If it sounds louder than this, you’re getting excessive spatter, and you should either lower your voltage or increase your wire speed setting.
Finding your ideal range of voltage and wire speed may take a while. Practice on scrap steel until you reach this to not ruin your project.
A rule of thumb I teach beginners is the 10 to 1 ratio. If you set your machine at 23 volts, start your wire speed at 230 inches per minute. Doing this will get you in the right ballpark.
From there, only adjust one. Increase the voltage or lower the wire speed until you get the frying bacon sound. Adjusting both at once will only increase the time to find that sweet spot.
11. Pushing or Pulling Your MIG Weld
This choice causes great debate in the welding industry. There is truly no right or wrong way regarding these two options.
You need to know the pros and cons, which will dictate when you should use each.
© weldguru.com – Image usage rights
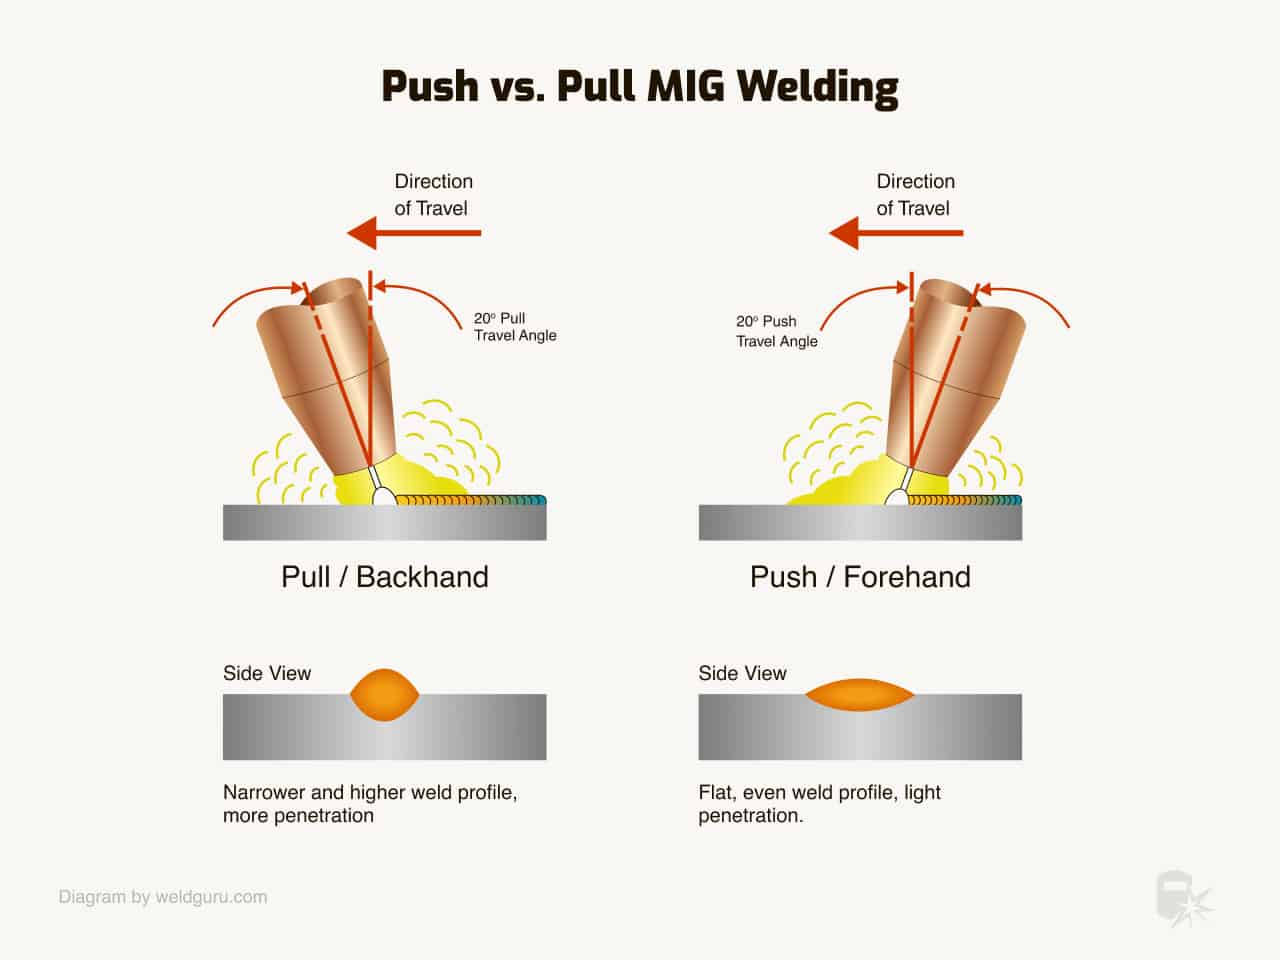
Pulling your weld will give you more penetration but slower welding speeds. Knowing this, you should pull your MIG weld on the root pass of your joints.
Your root bead is the most important pass for the strength of your joint, and you want this as high as possible with maximum penetration.
Pushing your weld will give you less penetration but faster welding speeds. Personally, I push all my welds except for my root passes.
12. Keep the Arc at the Leading Edge of the Weld Pool
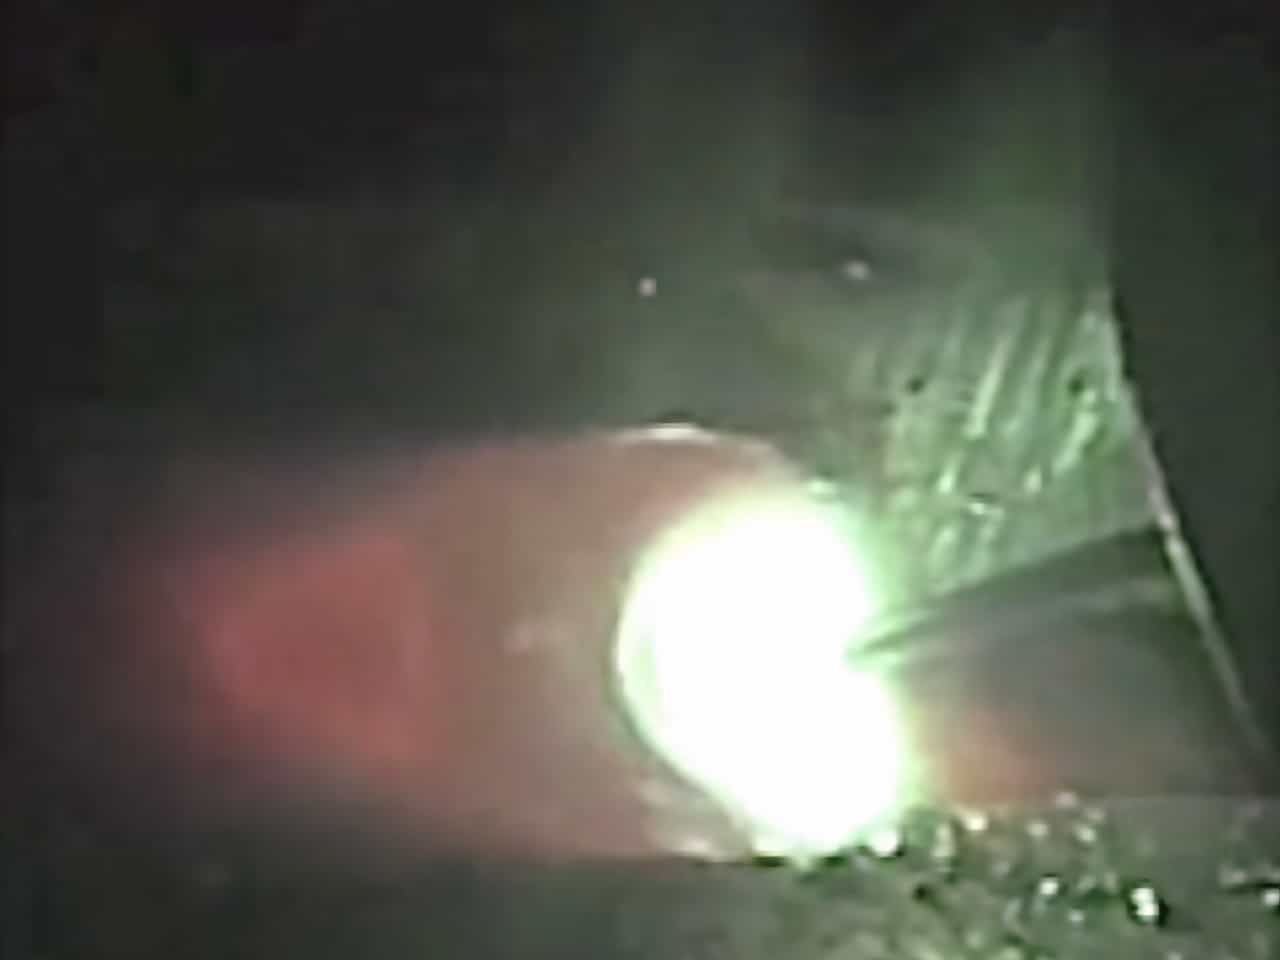
This technique is important in all welding processes. Keeping the arc at the leading edge of the weld pool will give you the maximum penetration needed.
© weldguru.com – Image usage rights
It’ll also make the puddle easier to see and manipulate how you wish. Finally, it’ll give you the proper arc length, creating sound welds.
13. Use Multi-Pass Welds for Thicker Materials
Multi-pass welds are necessary when welding thick materials where you can’t accomplish your desired weld size with one pass.
For fillet welds, use stringers. You’ll always stack them from the bottom up, making your joint angle the toe of the previous weld.
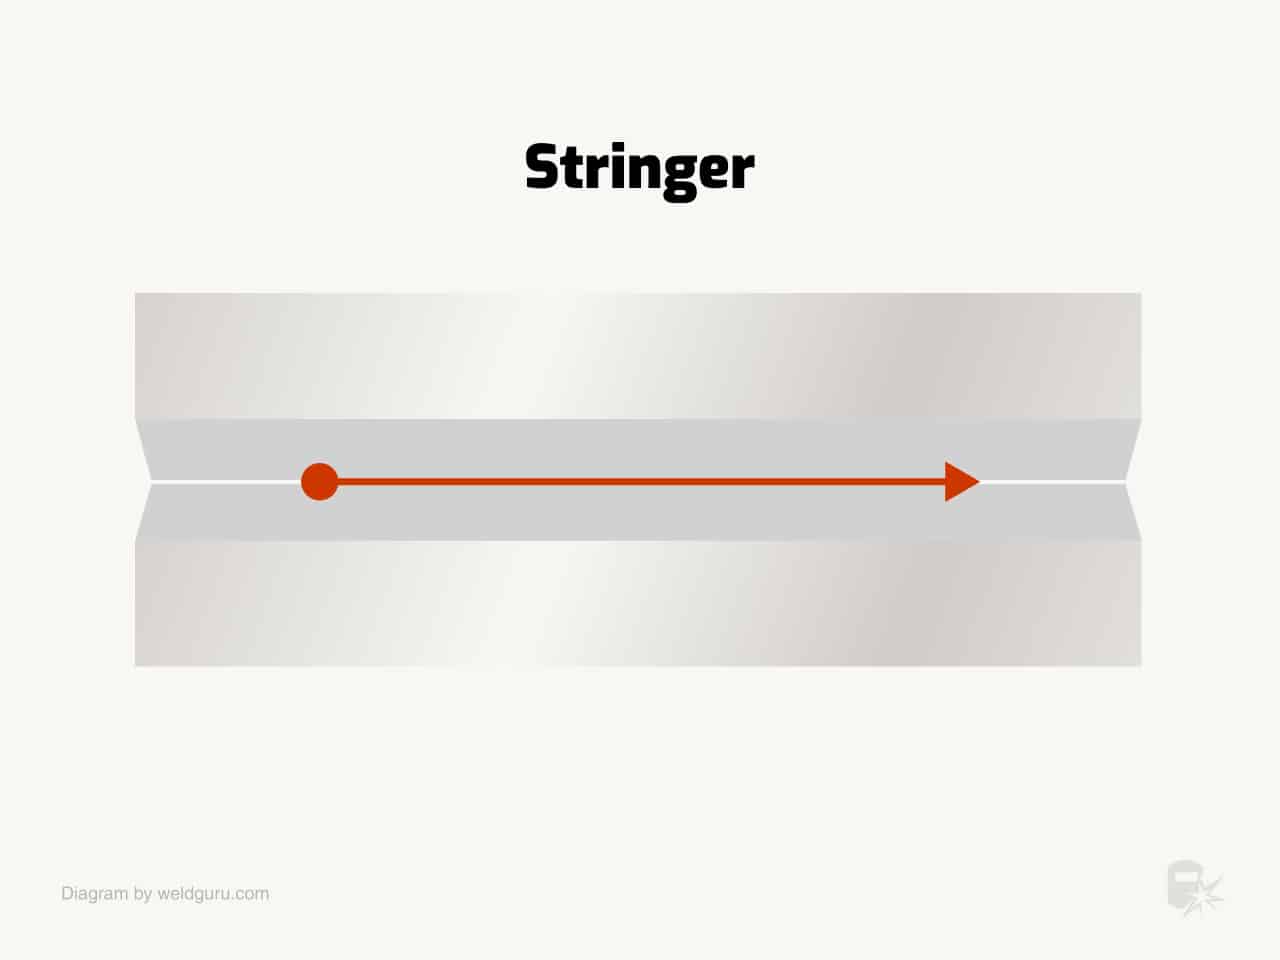
© weldguru.com – Image usage rights
The toe of the weld is the edge of the weld. Pointing your wire there will give you the proper bead placement.
As you can see in the picture below, when you place your next weld on the toes of the weld, your weld puddle will cover 50% of the weld below and 50% above.
The desired weld will be a nice 45-degree slope for fillet welds.
If you don’t have proper bead placement, you risk cold lap, improper weld size, and unequal leg length. Unequal leg length happens on fillet welds where there’s more weld on one plate than the other.
You can use fillet welds, as explained above or a weave pattern for groove welds.
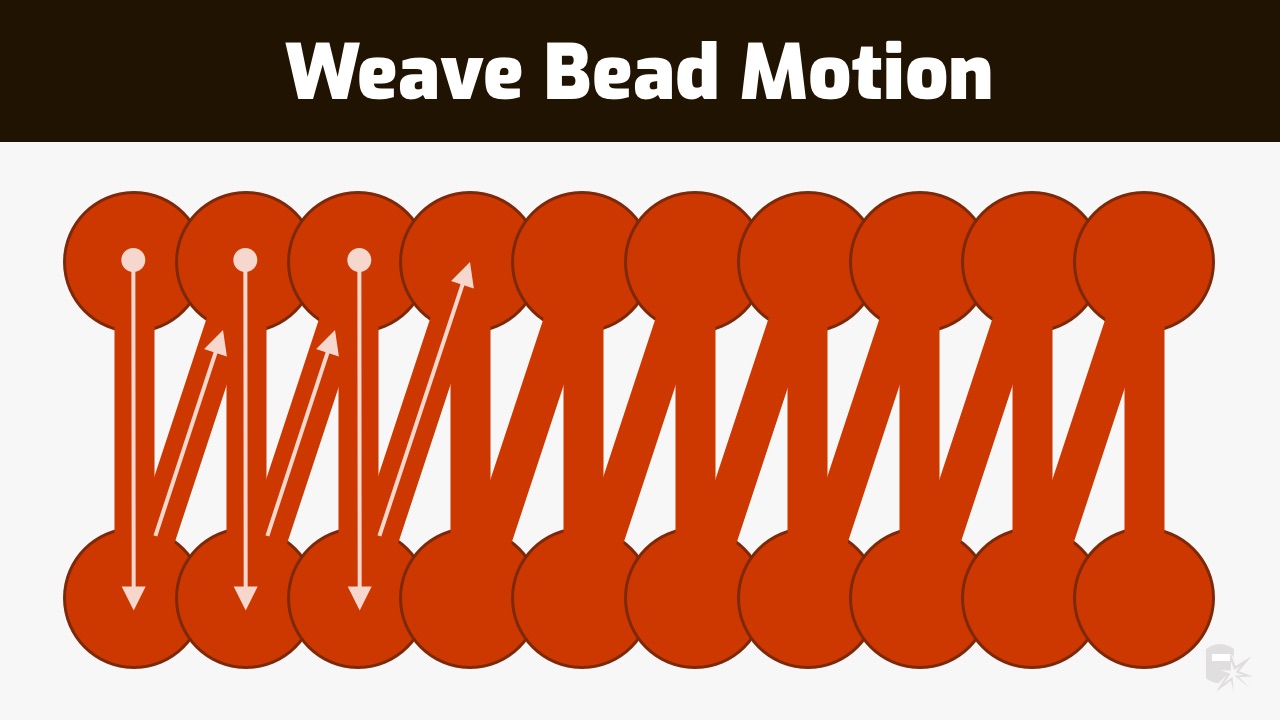
© weldguru.com – Image usage rights
A weaving pattern is when you go from side to side inside the welding joint, moving quickly through the center and pausing on the edges to avoid too much weld deposit in the center and undercut on the edges.
14. Learn To Read Your Bead
Your bead tells you everything you did right or wrong while welding. If you have a nice, uniform, consistent weld with no weld faults, don’t change a thing.
If your weld is wider in some spots and thinner in others, your travel speed is inconsistent. If you have more weld on one plate than the other, your MIG gun joint angle is off.
If you have porosity, your wire stickout could be too long, your parent material too dirty, or your work environment too windy.
Learn to read your bead, as it’ll tell you everything you need to know about how well you’re doing.
15. Replace Contact Tips Regularly
Your contact tip is an important part of your MIG gun. Because of this, it needs to be properly maintained.
Your contact tip experiences significant heat and electricity during welding, causing it to wear, tear, and lose effectiveness. You’ll always want to ensure it stays clean and remove spatter.
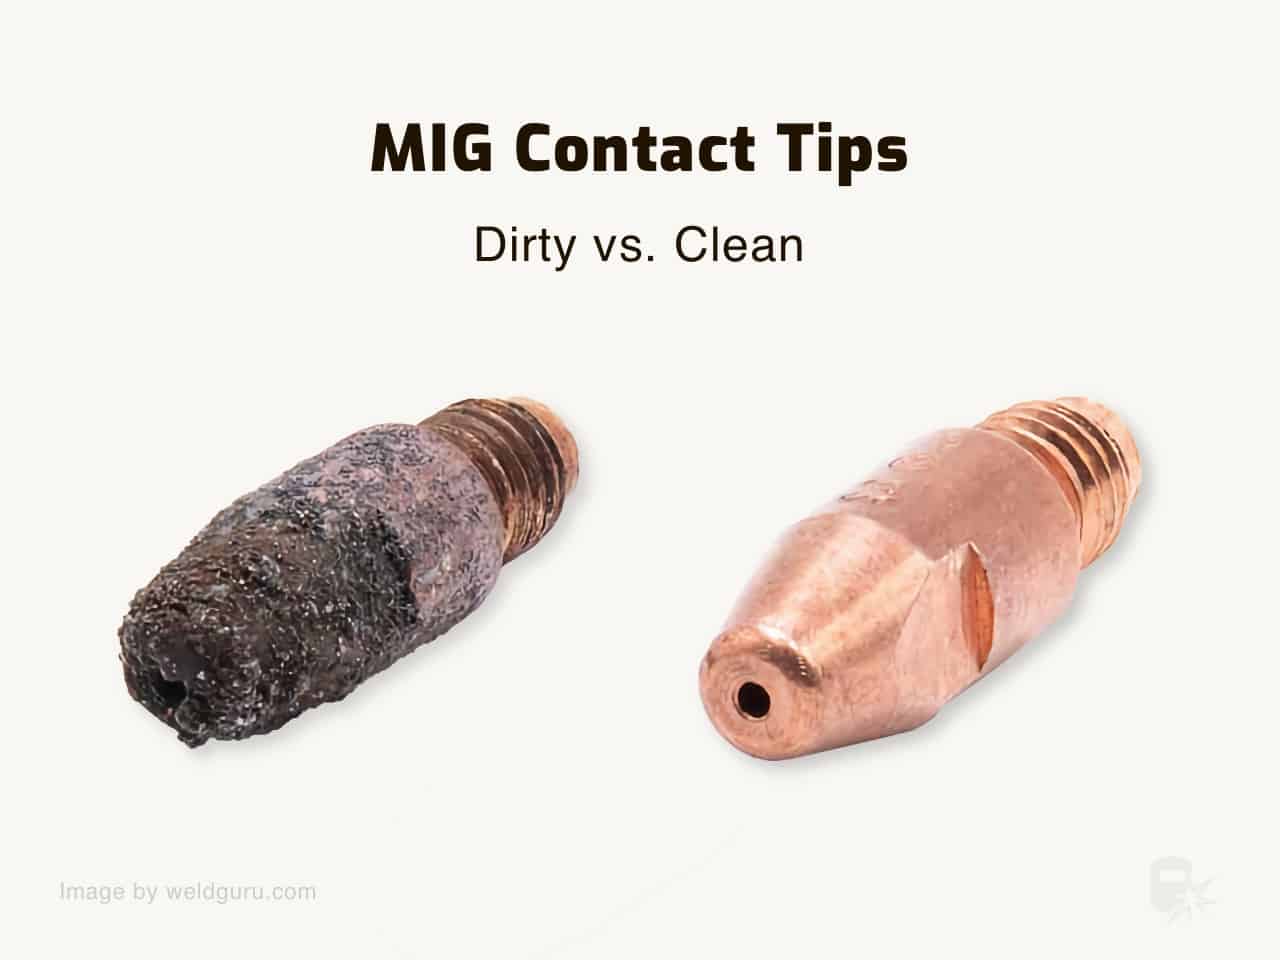
© weldguru.com – Image usage rights
Proper maintenance of your contact tip will give you a steady arc, consistent penetration, less spatter, no wire burn back, and less downtime during your projects.
You can spray it with anti-spatter spray to make it last longer.
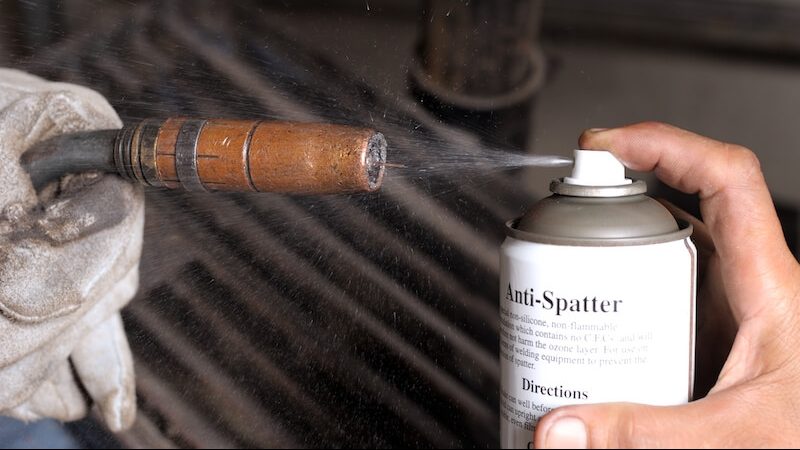
© weldguru.com – Image usage rights
16. Use Anti-Spatter Spray
Using anti-spray around your weld zone isn’t a bad idea. It’ll make cleaning up your weld much easier.
Just be careful on parts you’ll want to paint, as, at times, the anti-spatter spray can be very difficult to remove, making painting more difficult.
Use it sparingly and only around your weld zone. Doing this will reduce the negatives of using it.
Wrapping It Up
All in all, MIG welding (GMAW) is a great process to use for DIY. Follow these guidelines, and you’ll reach success in no time.
Just know that welding is a skill; the more you do it, the better you’ll get. Don’t give up! It’s just like riding a bike. You didn’t get on a bike the first time and ride away.
You fell a few times, learned, adjusted, and tried again until you got it right. The same goes for welding. Good luck!
