
Scratch start TIG is a method of starting a TIG arc that involves scratching the tungsten electrode on the metal piece which initiates an arc. It’s not the cleanest way to start the TIG arc, but it works well for DIY and less demanding applications.
But don’t underestimate scratch start TIG. There is more to it than meets the eye.
This article will teach you how to correctly perform a scratch start arc, when to use it, and some valuable tips and tricks.
When to Use A Scratch Start for TIG

Scratch start is still widely used and can make quality welds, even if it’s the least preferred TIG arc starting method.
Lift and high-frequency arc starting methods are much cleaner since they have far lower chances of contaminating the weld with tungsten inclusions.
Since TIG welding is a sensitive process, using the scratch start method only makes sense if that’s all you have available.
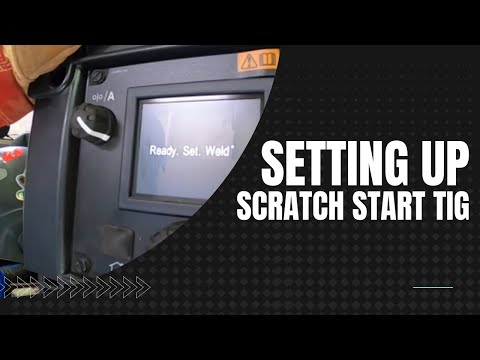
Usually, the low-end TIG welders include scratch start as the only way to start an arc. But, some multi-process machines offer the basic DC TIG with a scratch start.
You can also DC TIG weld using any DC stick welder, but you’ll be limited to scratch start. But this is a relatively easy way to dip your toes into TIG welding.
If you already own a stick machine, you can TIG weld carbon steel and stainless steel with a scratch start with a small investment for some needed parts and consumables.
Scratch start TIG should not be used for critical structures or joints where failure can create a danger to others.
While scratch start TIG can make X-ray quality welds, it takes years of experience, and most welders should not attempt it. The tungsten inclusions can create hard spots in the weld, which can lead to cracking under load.
So what would you weld with this process?
Scratch start works best to weld up DIY hobby projects, furniture, decorative elements, gates, metal art, and other non-critical jobs.
Related read: Different Types of Tungsten Electrodes
How to Properly Scratch Start a TIG Weld
Scratch start only makes sense to use with inexpensive DC TIG machines. It’s necessary to use direct current electrode negative (“DCEN”) polarity to DC TIG weld.
DCEP concentrates too much current on the tungsten electrode, which results in tungsten erosion and causes the electrode tip to ball up.
Connections
So, connect your TIG torch to the negative polarity DINSE connector on your TIG welder and the ground clamp to the positive polarity connector. Later in the article, we’ll also explain how to convert a stick welder to scratch start TIG if that’s the only machine you have.
After setting your flow rate for a 100% argon shielding gas, attach the ground clamp to the piece and turn on the welder, then you are ready to work.
Clean up
But, scratch starting an arc is not straightforward and often results in the tungsten electrode sticking to the workpiece. The tungsten metal causes significant weld contamination.

So, it’s necessary to re-grind everything, including the tungsten electrode, when the electrode does stick. The tungsten tip should be clean before attempting another weld.
Scratch Starting Properly
But, the best cure is prevention. The correct way to scratch start an arc is to perform a gentle swiping motion as if you were striking a match.
Place the palm that holds the TIG torch on the table so that your pinky finger makes firm contact to stabilize the torch. If necessary, use the other hand to provide additional support to the hand holding the torch.

© weldguru.com – Image usage rights
The better your control over the torch, the higher the chances that you’ll establish an arc without tungsten sticking. The key to a successful scratch start is barely scratching the tungsten over the metal and lifting it off quickly.
Additional force is unnecessary, and hand tremors can push the tungsten hard into the surface as you strike it.
Once the arc is initiated, lift the tungsten upwards and keep it about 1/8 in. away from the weld pool. This takes practice. So, don’t be discouraged if you fail at first.
You must lift the torch away from the welded metal to extinguish the arc. Unfortunately, unlike other arc welding methods, you cannot stop the arc by pushing a button. So, it’s also more challenging to end the weld with scratch start TIG correctly.
Related: Lift Arc vs Scratch Start TIG
Scratch Start TIG Tips & Tricks
As with most welding processes, there are a few trade tips that can make your scratch-start TIG welding experience better.
- Sharpen the tungsten. The sharper the tungsten tip, the easier it is to gently scratch the metal surface without sticking the electrode
- Place a small piece of clean scrap metal above the welded joint, initiate the scratch start on it, and carefully move the arc to the actual joint. The scratch start will contaminate the scrap metal. So, you’ll avoid tungsten contamination of the joint.
- Don’t use scratch start to TIG weld aluminum. This difficult material requires a high-frequency start and AC TIG welding.
- Don’t forget to turn on the torch valve and release the shielding gas.
- After you pull the torch away to extinguish the arc, bring it back to keep the shielding gas flow on the hot metal to protect the weld as it cools down
You’ll find a few additional tips in the video below, including how to use a DIY foot pedal for scratch start TIG.

Get more TIG tips and techniques in this guide.
Using a Stick Welder to Scratch Start TIG Welding
Stick welders use a constant current (“CC”) power source just like TIG welders. So, you can convert any stick welder into a basic DC TIG machine.
You will need the following to TIG weld with a stick welder:
- TIG torch with a gas valve on the torch’s body and a separate gas line that hooks to the gas tank
- 100% argon shielding gas cylinder
- Argon regulator
- Tungsten electrodes
- Power cable TIG adapter (if your stick welder doesn’t support DINSE plugs)
There are two ways to scratch start TIG weld with a stick welder:
- By attaching the TIG torch directly to the negative DINSE connector on the stick welder
- By using a stick electrode holder to supply negative DC to the TIG torch
Before attaching the argon regulator to the shielding gas bottle, crack open the argon bottle for a fraction of a second. This cleans the valve of any dust.
Make sure to follow all OSHA hazard prevention tips for gas cylinders.
For example, don’t stand in front of a regulator when you open the gas bottle. If the regulator is defective, the gauge meter can fly off and injure you.
If your stick welder supports standard DINSE connectors, get a matching DINSE size TIG torch, and you are all set. The TIG torch hooks to the negative DINSE terminal, and its gas line attaches to the gas regulator on the bottle.
But, if your stick welder has integrated leads, you’ll need the power block we mentioned earlier. Luckily, it’s dirt cheap and sold on Amazon.
There are two ways to use this adapter:
- Option 1: You have a single line TIG torch (gas and power go in one cable)
- Thread the torch connector to the brass power block and thread the power block to a separate gas line attached to your gas cylinder. The connection order is gas cylinder – gas hose – power block – single line TIG torch.
- Next, attach the stick electrode holder to the lug of the brass power block to provide power to the TIG torch.
- Be sure you switch your stick welder to DCEN output. If the stick welder is pre-set to work with DCEP, you won’t get the best performance.
- Option 2: You have a two-line TIG torch (one line for gas and another for power)
- Connect the torch gas line directly to the argon regulator on the gas cylinder.
- Thread the power cable to the brass power block.
- Attach the stick electrode holder to the lug on the power block to power the torch.
This video shows how to assemble everything, including the power block.
If you must use the power block described above, don’t buy a TIG torch with a DINSE connector. There aren’t any power blocks available that support DINSE plugs.
Instead, get an air-cooled torch with a 3/8-24 RH fitting. But, some DINSE plugs use the power cable threaded into a 3/8-24 RH fitting on the inside.
So, even if you have a DINSE plug TIG torch, you may still be able to use a power block by disassembling the DINSE connector and then threading the 3/8-24 RH fitting to the power block.

Image credit: USA Weld
Of course, if all else fails, you can attach the stick electrode holder to the DINSE plug itself.
If the electrode holder cannot get a solid grip over the plug, disassemble the DINSE covering and expose more of the brass body for a better grip.
You can see how to disassemble the plugin the video below:

While this sounds challenging, the whole process takes less than five minutes to set up.
However, if you prefer to get a TIG/stick combo instead, we suggest the two inexpensive welders below.
| Feature / Welder | YesWelder ARC Welder 165A | PrimeWeld 160A |
|---|---|---|
| Welder Type | Stick/DC TIG | Stick/DC TIG |
| TIG Start | Lift TIG (better than scratch start) | Lift TIG (better than scratch start) |
| Input Voltage | 110/220V | 110/220V |
| Output Amperage | 20-165A | 10-160A |
| Weight | 11 lbs. | 12 lbs. |
| Warranty | 1-year | 3-years |
| Price | $ See here | $$$ See here |
Wrapping It
Scratch start TIG is an inexpensive way to dip your toes into TIG welding if you already have a stick welder or a multi-process unit with a CC power supply.
But, if you are planning to buy a DC TIG welder, get a lift TIG capable welder instead.
The lift TIG machines are no longer as expensive as they used to be, and today the lift TIG is slowly being pushed into the hobby market as high-frequency (“HF”) takes the spot as the professional’s choice.
So, don’t invest in outdated scratch start TIG welders when lift start TIG machines are available for less than $200.