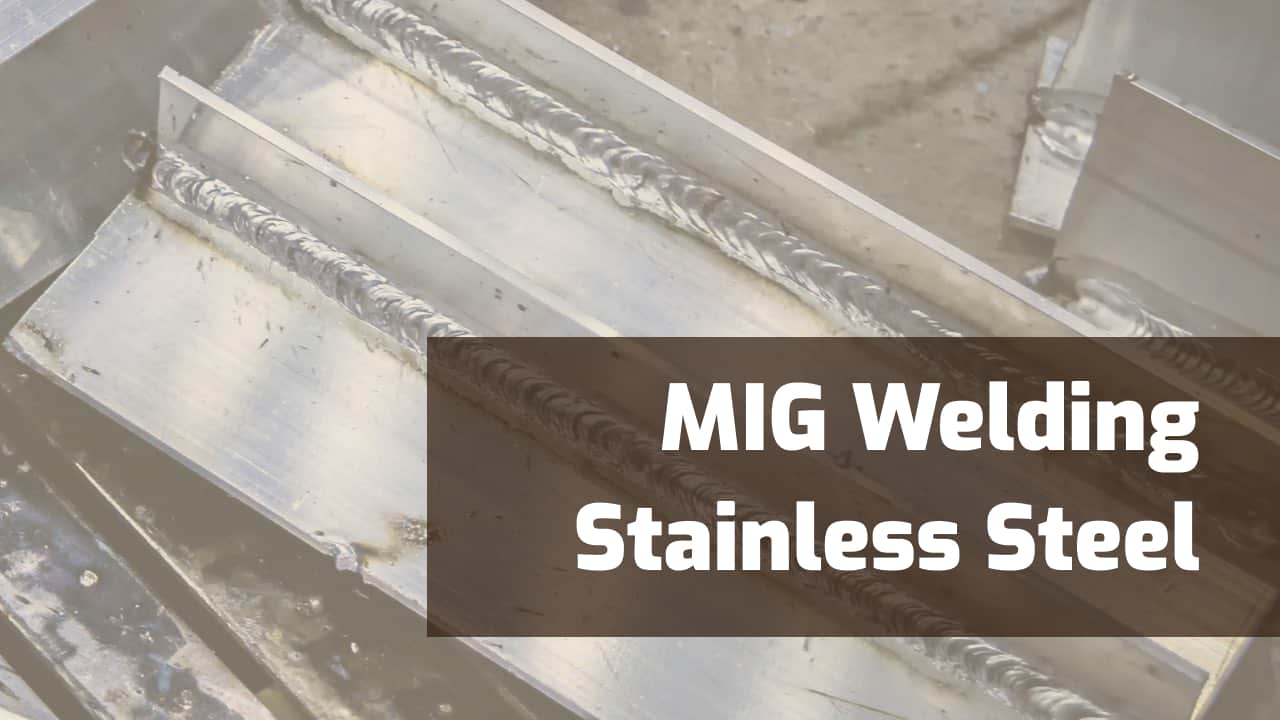
You may have many projects in mind that need to use stainless steel in their fabrication. Yet, fabricating and welding with stainless steel can seem daunting.
Throughout this article, you’ll learn about the various types of stainless steel, how to set up your MIG welding machine, and the proper technique.
The good news is once you get the hang of it, MIG welding stainless steel can become as natural as welding mild steel.
I also struggled at first, but the more I practiced, the easier it got. Welding is a skill and the more you do it, the better you will get.
Understanding Stainless Steel
Like many metals, stainless steel (SS) comes in many grades with various alloying elements. This metal is more heat and corrosion-resistant than other metals like carbon steel, cast iron, and aluminum.
Learning about the types of stainless can seem a little bit boring, but with so many types and grades out there, it’s important to have a basic understanding of what stainless steel is all about before you choose some for your project.
Different Types of Stainless Steel

There are four distinct types of stainless steel. Each one has multiple grades based on the alloying elements that they contain. They are:
- Austenitic – Austenitic stainless steels are the most widely used and readily available. This type contains chromium, nickel, and occasionally manganese or molybdenum. It’s non-magnetic and known for its corrosion resistance and excellent weldability. Some popular grades of austenitic stainless are 304, 310, and 316.
- Ferritic – Ferritic stainless steels have a lower nickel content, making them more affordable. The presence of more chromium and molybdenum offsets the low nickel content to improve its toughness. Unlike austenitic stainless, ferritic stainless steels are magnetic and are usually used in indoor applications where appearance is not a priority.
- Martensitic – Like ferritic steels, martensitic steels are magnetic. They contain 11% to 17% chromium and a moderate amount of carbon, which allows them to be heat-treated for increased hardness and strength. However, this makes them less ductile and corrosion-resistant than austenitic and ferritic stainless steels. They are used for applications requiring wear resistance, such as cutlery, surgical instruments, and fasteners. Examples include the 400 series (e.g., 410, 420, and 440) of stainless steels.
- Duplex – This group of stainless steels is either a combination of austenitic and ferritic or proprietary blends of alloying elements for specialized applications. A few examples of duplex stainless steels are 318L, 4501, and LDX 2101.
- Precipitation Hardening – This type of stainless steel is the least common. It’s best for applications with a tempered and hardened edge. Some typical applications for this type of stainless are scissors, knives, and tools used in the medical field.
| Family | Weldability | Ductility | High Temp Resistance | Common Grades |
|---|---|---|---|---|
| Austenitic | High | High | High | 304, 310, 316 |
| Ferritic | Low | Medium | High | 430 |
| Martensitic | Low | Low | Low | 410, 420 |
| Duplex | High | Low | Low | 2205 |
| Precipitation Hardening | Low | Medium | Low | 630 |
Properties of Stainless Steel
Stainless steel has many properties that set it apart from mild steel. Common properties in most stainless steels include:
- Corrosion and heat resistance
- High tensile strength
- Good durability
- Good formability
- Most grades have good weldability
It’s the alloying elements that give stainless steel these properties. For example, adding at least 10.5% chromium will increase a steel’s corrosion resistance by 200 times.
The Challenges MIG Welding (GMAW) Stainless Steel
Compared to welding carbon steel, stainless steel will give you several challenges. The main ones being contamination of the weld and distortion.
Contamination
Contamination of the weld or base metal can be a serious problem. Since stainless steel is a crafted mix of alloys, you must avoid introducing any contamination during the welding process.
Pre-clean your base metals and use separate tools for stainless steel to save your welding materials from contamination.
Distortion
Distortion and warping are problems that occur when welding any metal, but they’re quite common when welding stainless steel.
This is because stainless steel has a higher thermal expansion and a lower thermal conductivity. Meaning it absorbs heat quicker and keeps it longer making this a bad combination for distortion.
If you weld stainless steel too hot, the base metal chromium can become depleted, reducing the steel’s ability to withstand corrosion.

Therefore, heat control you are pouring into the metal is essential whenever you are welding stainless steel.
Setting Up Your MIG Welding (GMAW) Equipment
Before starting MIG welding stainless steel, you must prepare your welding equipment. While you can use the same welding machine for carbon and stainless steel, you must change several things before you strike an arc.
Choosing the Right Wire for MIG Welding Stainless Steel
Proper wire selection is the first and arguably the most important step in setting up your welding machine.
Finding the appropriate wire for the base metal can be very confusing with many different wires.
Most stainless steel you’ll weld is austenitic stainless steel, either the 304 or 316 grades.
The good news is there are only a few wire types to choose from:
- 308L – 308 wire is a good choice for many grades of stainless up to 316L. For example, you would select this type of wire when welding 304L stainless steel.
- 316L – For 316 stainless, this is the wire of choice because it has the same alloying elements as the base metal.
- 309L – This is the wire you have to use to weld stainless steel to carbon steel.
For other types and grades of stainless steel, you must research which wires you’ll need to use based on your chosen base metals.
Choosing the Right Gas for MIG Welding Stainless Steel
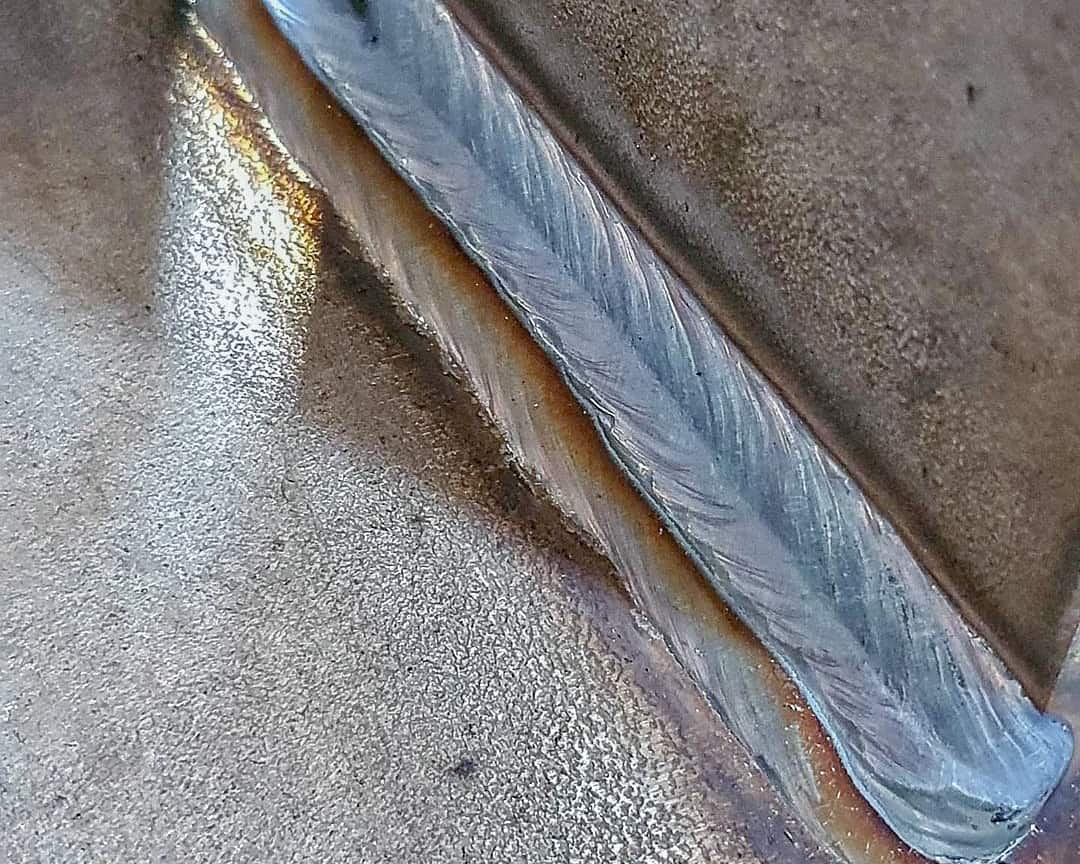
People often use the same gas they would for welding mild steel when welding stainless steel.
Even though the welds may seem, sound, and even look good, there is the potential for severe weld defects under the surface.
© weldguru.com – Image usage rights
Shielding gas is critical to MIG welding; inappropriate or insufficient gas can cause major weld problems.
The most crucial factor is that the shielding gas you select must have less than 5% carbon dioxide content.
When too much carbon gets into the weld and into the base metals, corrosion resistance will decrease.
When selecting a shielding gas, you must consider what type of transfer you plan on using while you are MIG welding.
For example, the shielding gas you may use for short-circuit transfer won’t work well for spray transfer and vice-versa.
Two common examples of shielding gasses you may want to consider are:
- 98% argon & 2% CO2 – This mix is a popular choice for welding thicker sections of stainless steel using spray transfer.
- Tri-mix – If you use short circuit transfer on stainless steel, a tri-mix gas will be more costly but most appropriate for this application. Tri-mix will contain 85-90% Helium, as much as 10% Argon, and 2.5% CO2. Some tri-mixes will use O2 or N2 in place of the argon.
| Shielding Gas | Process | Notes |
|---|---|---|
| 75% Argon / 25% Co2 | FCAW | Stainless FC wires typically run with 75/25 |
| 98% Argon / 2% Oxygen | GMAW | Primarily used with the spray transfer mode |
| 98% Argon / 2% Co2 | GMAW | Primarily used with the spray transfer mode |
| 90% Helium / 7.5% Argon / 2.5% Co2 | GMAW | Primarily used with the short circuit transfer mode |
Adjusting Voltage & Amperage Settings
Your voltage and amperage settings will vary depending on many factors, such as the type of welding machine, wire diameter, shielding gas, material thickness, and weld size, to name a few.
So, when looking for a good place to start, I suggest using the settings the welding wire manufacturer recommends or these starter MIG settings here.
Sometimes when you use the manufacturer settings, you’ll get lucky and find the machine welding beautifully. However, often you’ll need to adjust the voltage and amperage settings to produce a high-quality weld.
You’ll adjust the amperage settings on a GMAW machine through its wire speed. Increasing the wire speed will result in higher amperage, and lower wire speeds will result in lower amperage. When you adjust the amperage, you influence the amount of heat the arc generates.
Which in turn affects your weld puddle viscosity. You want to get this just right as your welding puddle on stainless steel is harder to control than on mild steel.
Voltage controls the length of the arc and the penetration of the weld. So, the thicker the base metals, the higher the voltage setting.
When you’re adjusting the machine settings, adjust only one variable at a time and run a few beads on scrap material to see how the weld metal responds to the change.
Pre-Cleaning Process for Stainless Steel
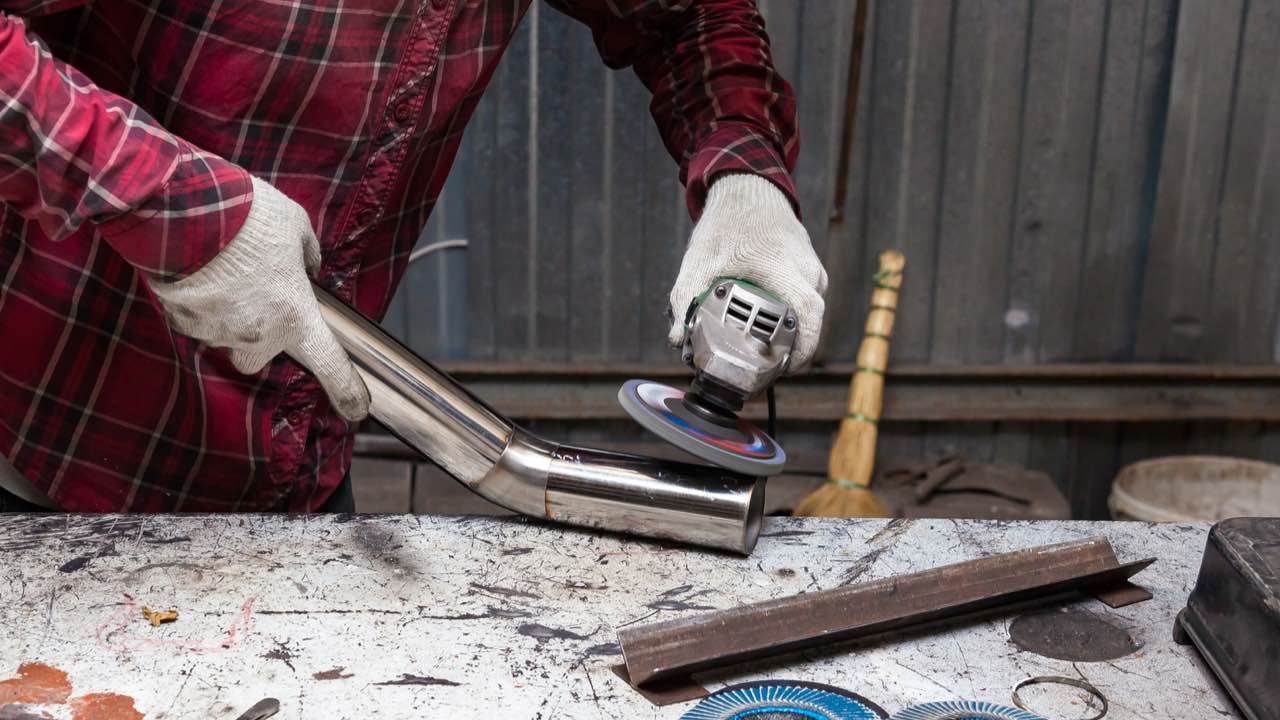
Cleaning the base metal before welding is a critical component of the welding process. When stainless steel welds become exposed to contaminants on the base metals, the result will be serious weld faults.
One of the good things about stainless steel is that pre-welding cleaning is usually easy and doesn’t need any specialized tools.
To pre-clean stainless steel, all that you need to do:
- Blow away any dust and debris
- Use a wire brush or wire wheel to remove any oxidation. Always use a dedicated SS wire wheel, and SS brush to avoid any cross contamination from other materials
- Wipe the metal down with alcohol, acetone, or any other cleaner that won’t leave an oily residue
Pre-cleaning is the essential first step to a successful stainless steel weld and should always be taken seriously. Failure to properly pre-clean will result in bad welds and a lot of frustration.
5 Tips for MIG Welding Stainless Steel
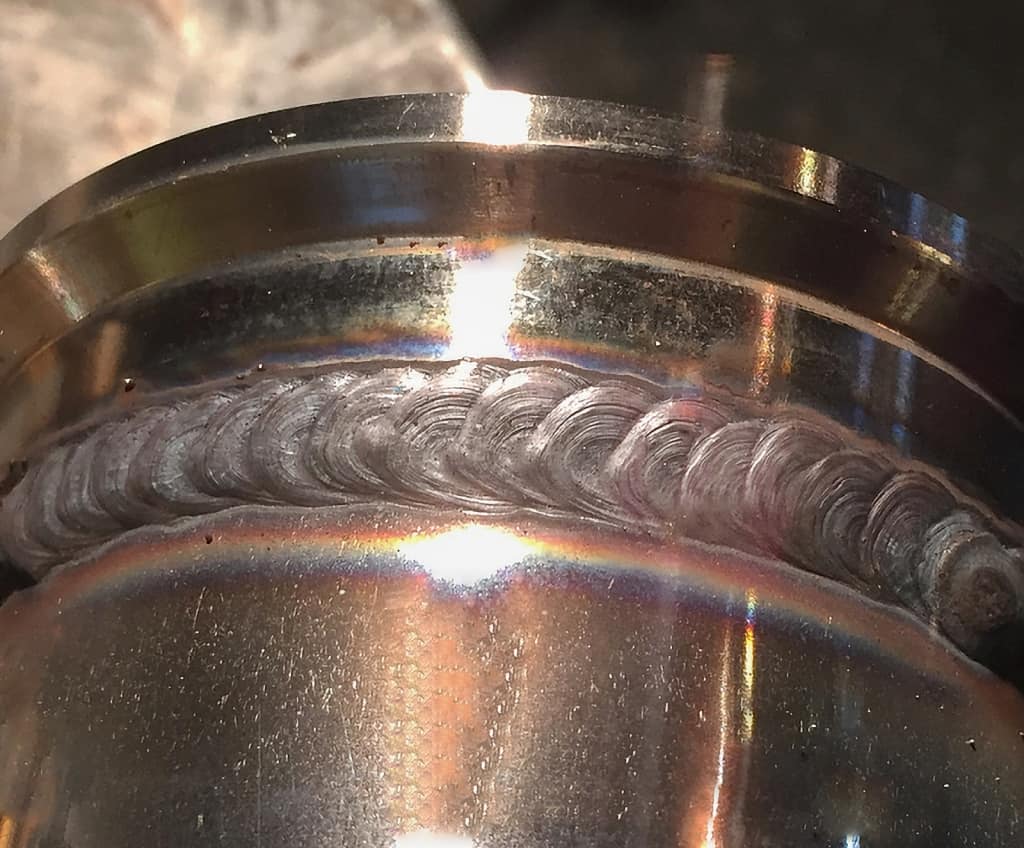
When welding two pieces of stainless steel together, the procedures will be close to welding mild steel.
If you can lay down a good and sound weld bead using mild steel wire, you’ll only need to make some minor adjustments to become comfortable with stainless steel MIG welding.
© weldguru.com – Image usage rights
Try not to think of it as a mysterious alloy; start by welding it like you would mild steel and see what you end up with.
It’s always best to start by welding the way you are most comfortable and then make adjustments from there.
The major difference will be that you will have to move faster as stainless steel melts more easily and keeps heat longer than mild steel.
1. Use A Proper Gun Angle & Travel Speed
© weldguru.com – Image usage rights
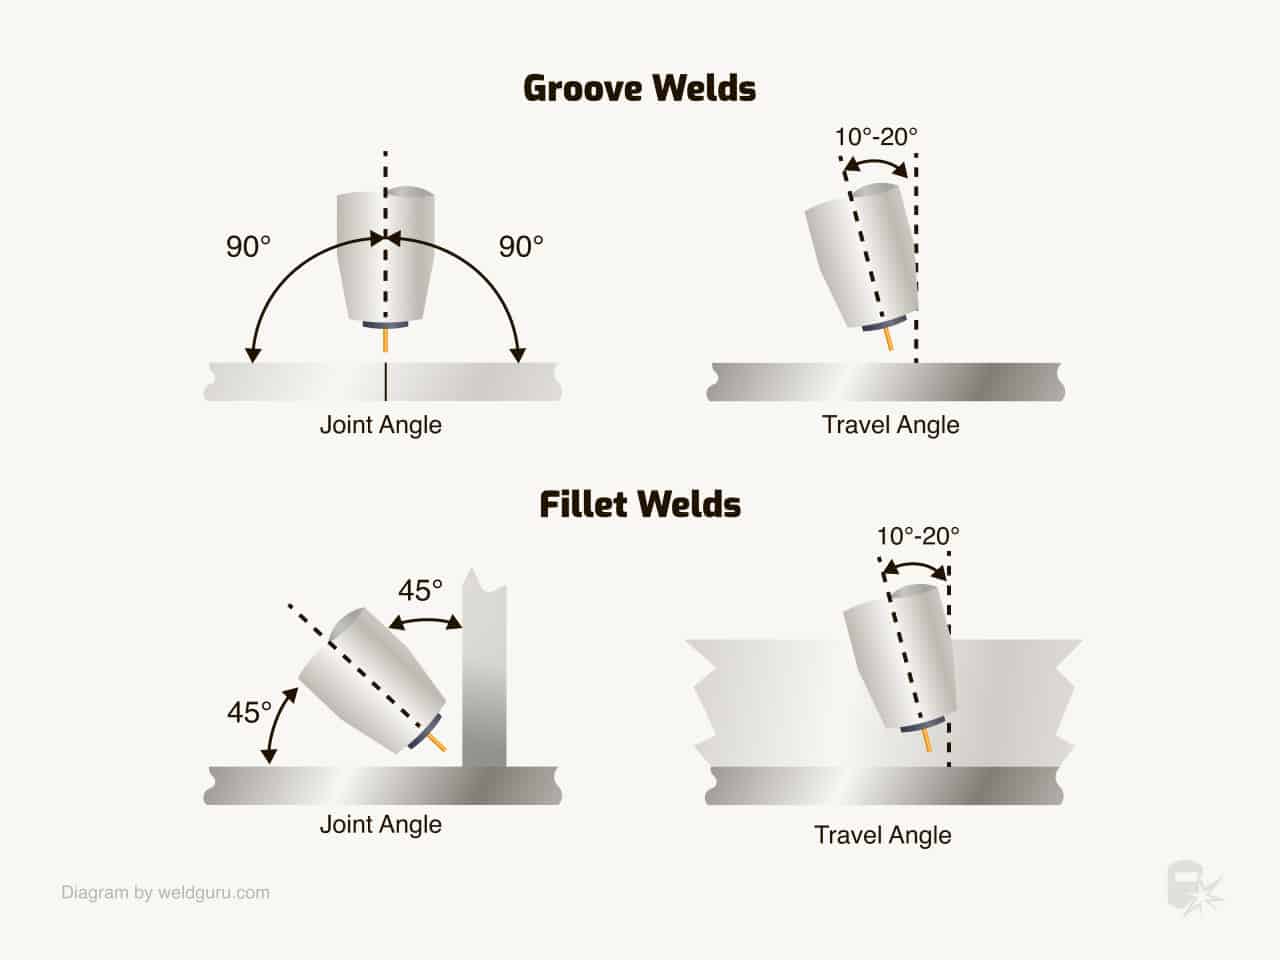
When MIG welding stainless steel, you’ll want to orient the welding gun at between 5 and 15 degrees in the direction of travel. This allows the shielding gas to provide good coverage around the weld area.
Your travel speed is set by the size of the weld you want and by the thickness of the material.
The thinner material will need much faster travel speeds to keep the heat-affected zone narrow and prevent blowing through the material.
Distortion and blow-through happen when there is too much heat in one place. Therefore, travel speed is crucial.
On the other hand, thick base metals need more heat input and slower travel speeds to get good fusion.
2. Maintain A Consistent Arc Length
Maintaining a consistent arc length is important for MIG welding on all metals, but it’s more critical when welding on stainless steel.
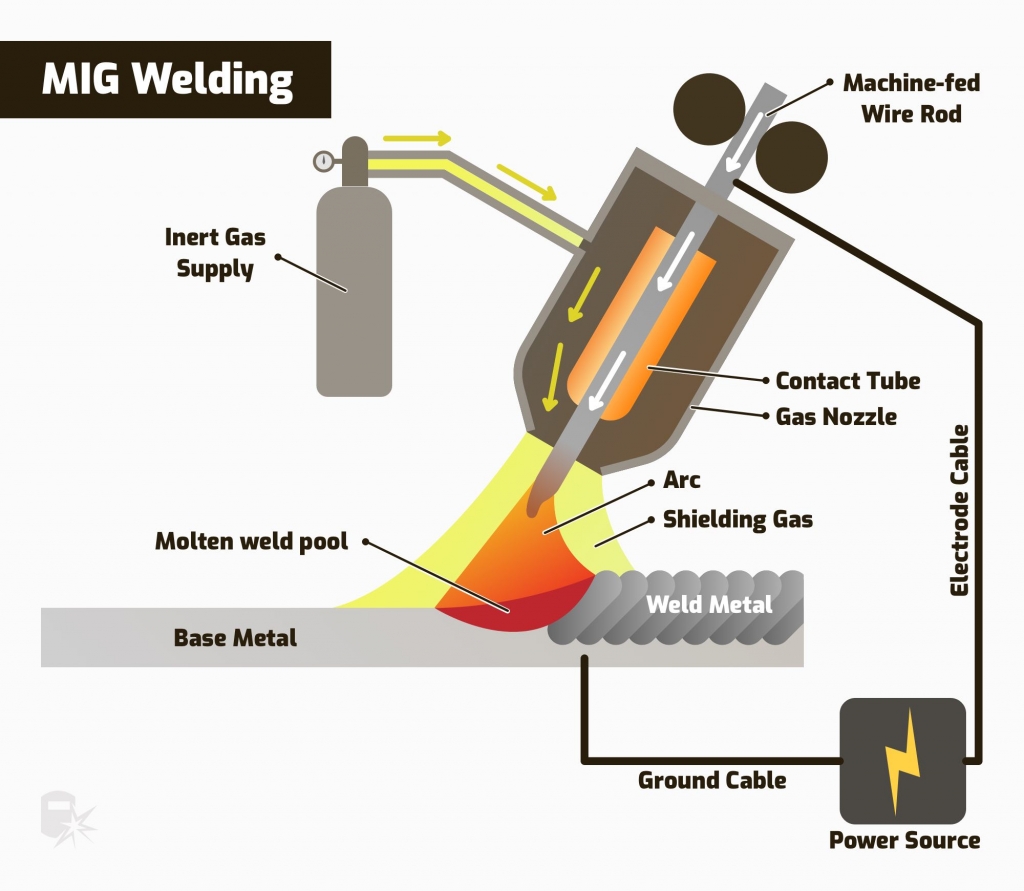
The height of your welding gun nozzle above the weld puddle is how you set your arc length. If it’s too far away, the shielding gas coverage will be less, and the arc will be more unstable and erratic.
This will cause porosity and other weld defects, as well as a weld that doesn’t look good.
© weldguru.com – Image usage rights
On the other hand, if your nozzle is too close, it can drag into the puddle contaminating the weld metal.
I have always found that most of the problems I have had with defects like porosity were because I held the nozzle too far away from the weld, and there have been many times when I was far too close and suffered the wrath of nozzle drag.
It takes practice to get a feel for the ideal arc length, so don’t get discouraged if your first few welds have these issues.
Learn to read your puddle and make adjustments as you go.
3. Adjust The Inductance to Improve Puddle Flow
Some MIG welding machines have inductance controls that allow you to adjust the time the welding current takes to go from zero amps to the set amperage.
Controlling inductance is best suited for when you are using short circuit transfer with MIG welding and want to improve how fluid the puddle is and reduce spatter.
You can think of inductance as a way to fine-tune the short circuit transfer arc by adjusting the frequency of the short circuit cycle.
As you increase inductance, you increase the amount of time the wire is in contact with the base metal, resulting in less spatter and a softer, more fluid puddle.

© weldguru.com – Image usage rights
When you lower the inductance, the arc becomes more violent, and you’ll get far more spatter and a puddle that freezes fast and is less fluid.
So, that’s why lower inductance is best suited for thinner materials where you don’t want to burn through the metal.
The inductance control on a welding machine can be a knob labeled 1 – 10 or as a percentage. For general MIG welding on carbon steel, an inductance of 30% is usually good, but an inductance of 50% is often needed on stainless steel.
4. Swap Drive Rolls & Liner to Prevent Contamination
Preventing contamination is a major concern when welding on stainless steel. One thing that you should be doing is using a dedicated set of drive rolls and liners for stainless steel wire.
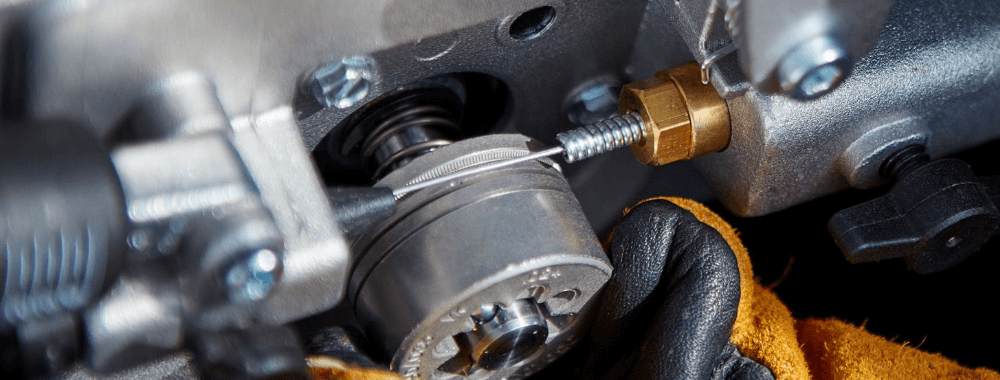
Drive rolls and liners will pick up contamination from other wires and metal dust in the air, which transfer it to the stainless wire and into the weld metal.
You must blow out the wire feed assembly and liner with compressed air while changing the drive rolls. You must clean all the assembly’s metal dust before re-installing the drive rolls, contact tip and nozzle.
If you don’t have a separate set of drive rolls, you can clean them with acetone, alcohol or any other solvent that won’t leave any residue.
Another thing you should do is install a felt pad on the wire as it enters the wire feeder. This will wipe off any dust or grime that may be on the roll of the welding wire.
5. Use Post-flow Gas Coverage to Protect the Weld
If your welding machine has a post-flow setting, then you should be using it.
When you finish a weld, hold the nozzle over the end as it cools. This will protect it from contamination as it cools, resulting in a higher-quality weld.
Still new to MIG welding? Read these top MIG welding tips for beginners.
Using Pulse MIG
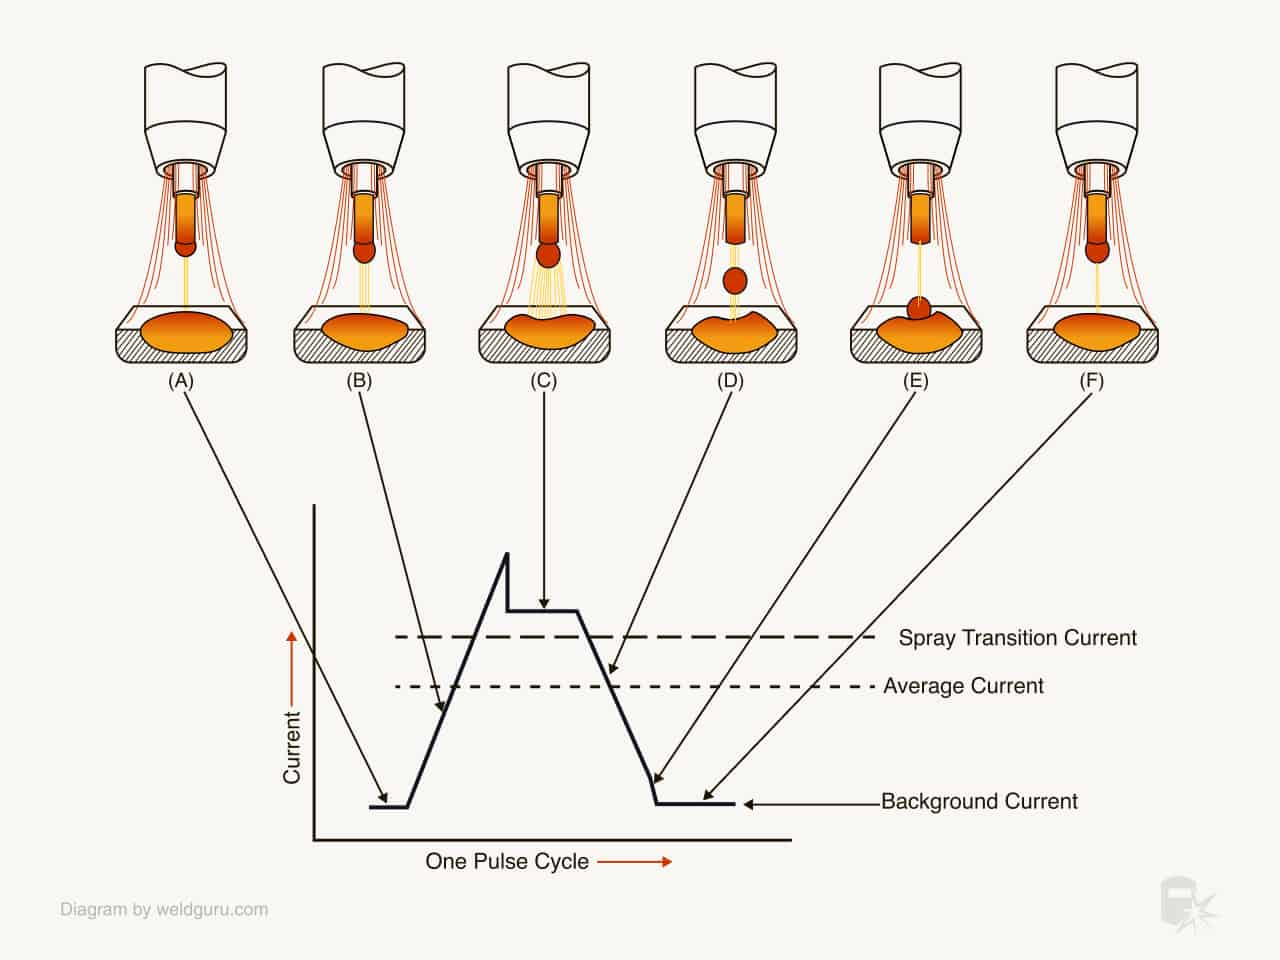
Pulse MIG is a welding process that uses a high-frequency pulsing current to produce an arc with a consistent frequency of high and low amperage pulses.
The background current is enough to maintain a stable arc that still melts the base metal, while the peak current melts the filler metal as the wire feeder feeds it into the weld puddle.
© weldguru.com – Image usage rights
The machine will switch between the background and peak currents at a high frequency which you can adjust to suit your needs and welding style.
The advantage of pulsed MIG is that the weld puddle freezes slightly between pulses which is suitable for out-of-position welding, controlling the heat input, maintaining consistent weld bead shape, and minimizing distortion.
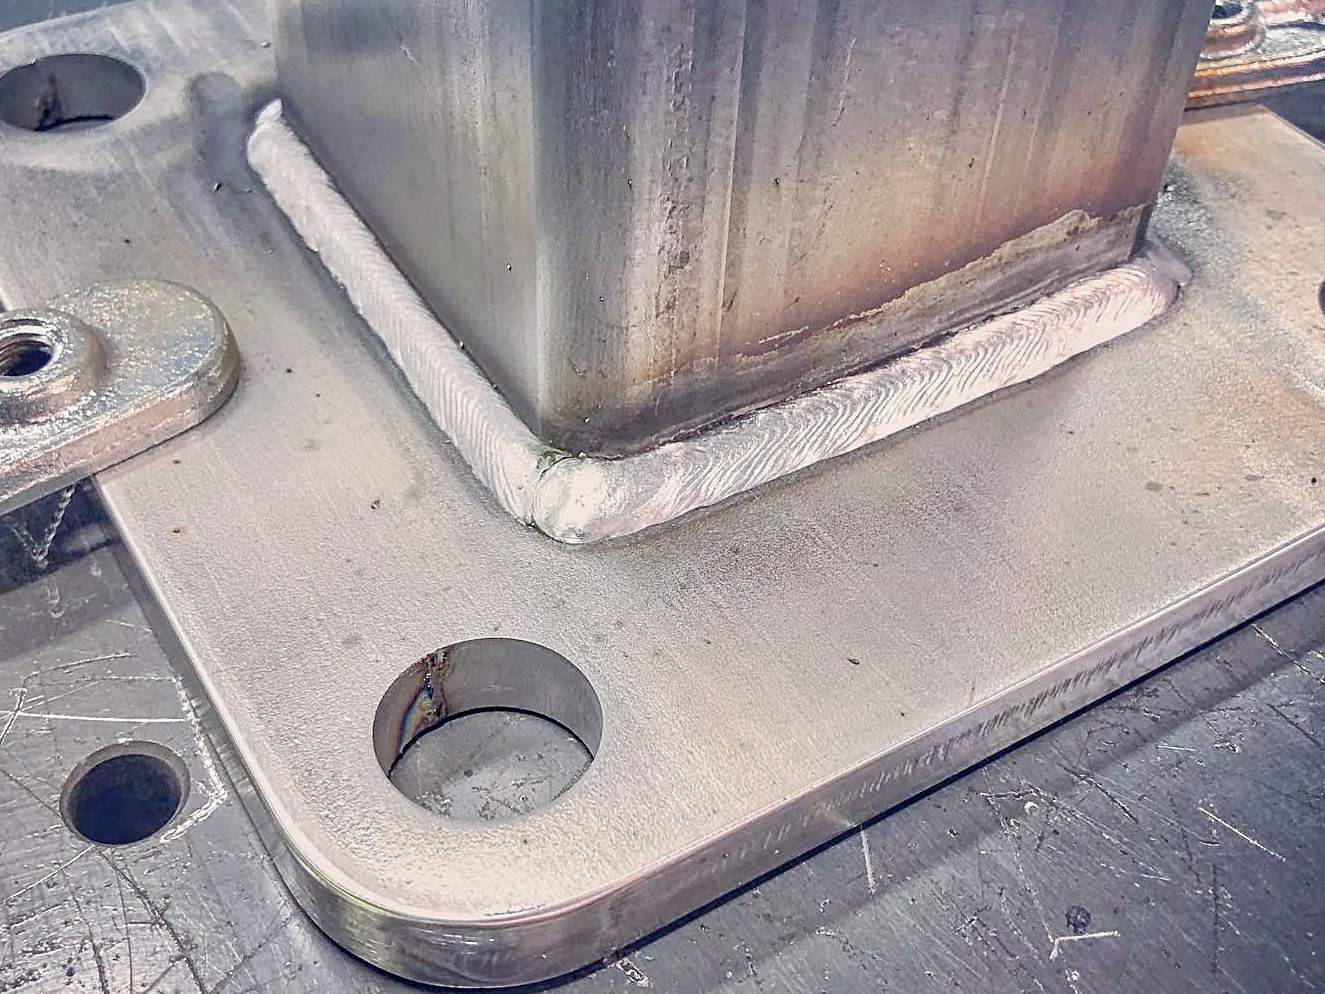
Pulse MIG is a fantastic choice for welding on stainless steel because it allows for a high-quality weld bead, minimal distortion, and low heat input.
© weldguru.com – Image usage rights
It’s especially great for welding thinner materials or in instances where the appearance of the weld bead is of critical importance.
Pulse MIG is a popular choice but requires a specialized machine which is often very expensive.
Read more: Pulse MIG Welding: What Is It? & Is It Worth It?
Wrapping It Up
There are many applications for stainless steel in the projects that DIYers, hobbyists, and beginner welders may take on.
The good news is that MIG welding (GMAW) stainless steel is well within your capabilities as long as you make the proper preparations and put a lot of time into practicing.
I can’t stress enough the importance of practice; the only way you’ll get comfortable welding stainless steel is to put in hours of welding time to hone your technique and increase your skill level.
As I learned to MIG weld stainless steel, there were many times when frustration almost got the better of me. If you stick with it and put in the practice, you can and will master the art of welding stainless steel.
If you have any tips for MIG welding stainless steel, let’s discuss them in the comments below.
Quick FAQs
Can You Weld Stainless Steel With Normal MIG Wire?
Combining stainless steel using regular MIG wire is often possible, but it will contaminate the base metal and remove the corrosion-resistant properties. The weld will also not be structurally sound. Therefore, although using mild steel wire to weld stainless steel is possible, it’s never recommended.
Can You Use 75/25 Gas To Weld Stainless Steel?
You can use a shielding gas of 75% argon and 25% CO2, but it’s not recommended, mainly because it’s important to avoid introducing carbon into the weld metal. Instead, there are far better options, such as tri-mix (mixture of helium, argon and CO2) and 98% argon and 2% CO2.
Can You MIG Weld Stainless With 100 Argon?
While it’s possible to weld stainless steel with 100% argon shielding gas, it’s not recommended because it will result in slower welding speeds and wider beads which won’t be appropriate for most welding applications.
Related Stainless Steel Reads:
How To TIG Welding Stainless Steel
